TWiki> Gunwiki Web>ArticleIndexByGun>RefAKFamily>ProcInstallKushnapupSaiga (25 May 2012, SeanNewton)
Installing a Kushnapup Stock onto a Saiga-12When Bjorn Muller's KushnapupOverviewThe Kushnapup stock is extremely firm and rigid, as one might hope for out of something like this. There's a grid of interlocking horizontal and vertical ribs within the stock, ensuring that it doesn't flex like most hollow, unsupported stocks. When correctly fitted, the Saiga inside is kept in place with a firm connection throughout the weapon's action, and the trigger moves freely. With my particular weapon, I had to make several changes to the stock before it would work smoothly (all of which are documented below). The instructions provided were short but decent, but there weren't a lot of close-ups or "If you get binding here, check this" troubleshooting steps. That's where this article comes in. It is my hope that this information will be as useful to other Kushnapup owners as it is to me.California Legal StatusSince I've gotten numerous questions on this, I've chosen to answer some specifics on the Kushnapup and California. Relevant bits regarding the assault weapon ban are below:
Differences between Stock Configuration and KushnapupThere are five significant differences between a stock Saiga-12 and a Kushnapup-stocked Saiga-12.
The Installation ProcessFirst, my apologies for not having posted as many pictures as one might otherwise hope. I was originally filming the assembly for a Youtube video, but my camera ran out of power halfway through, so I switched to stills. I have captured all of the fitting process, and all that was lost was my opening the box with my trusty Espada XL, discovering the T-shirt which all pre-order customers received, and then figuring out how the trigger transfer bar assembly goes together.Troubleshooting the Kushnapup
Fitting the Stock to the Assault Planet Maglock (California)My Saiga-12 is equipped with an Assault Planet magazine lock. This design fits the magazine release within a tower-shaped cage, in order to protect the world from the terror of Californians with semi-auto shotguns equipped with detachable magazines.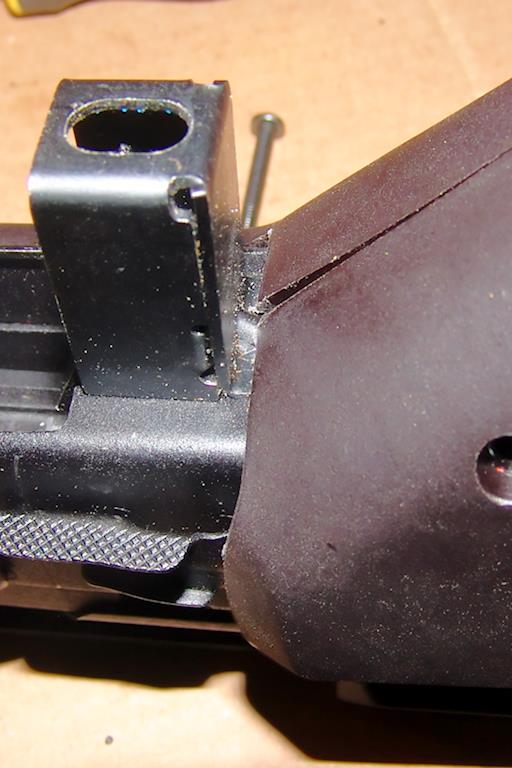 The magazine lock, preventing the stock from fitting together. Note that the bump on the metal sticks up, placing tension on the stock. The solution here is to use a dremel, file, or knife to remove enough material from the stock that it can fit together smoothly.
 This picture does a particularly good job of showing what fitting is necessary with the mag lock. There's a screw head right where the stock is going to want to go over it, and the magazine tower itself is a relatively thick gauge of sheet metal which necessitates filing the stock to provide the necessary clearance. This picture does a particularly good job of showing what fitting is necessary with the mag lock. There's a screw head right where the stock is going to want to go over it, and the magazine tower itself is a relatively thick gauge of sheet metal which necessitates filing the stock to provide the necessary clearance.
 Using a file to shave down the stock so that it will fit over the mag lock. Using a file to shave down the stock so that it will fit over the mag lock.
 The stock, tightened down. Notice the gap in the center, and the swelling on the mag lock tower? This is because I hadn't yet filed enough clearance for the swelling. Once I did so, it fit smoothly. The stock, tightened down. Notice the gap in the center, and the swelling on the mag lock tower? This is because I hadn't yet filed enough clearance for the swelling. Once I did so, it fit smoothly.
The Trigger ActuatorJust about all bullpup conversion systems require some method of relocating the trigger pull from the bullpup stock's trigger, back to the actual trigger of the weapon trapped inside of the stock.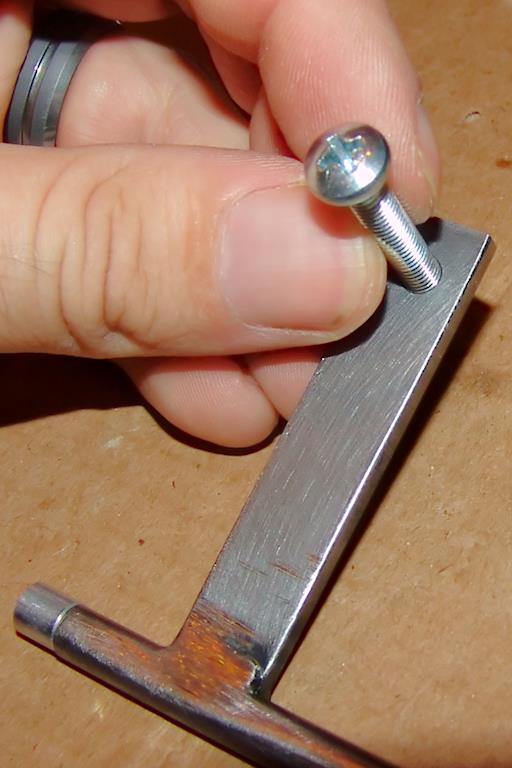 First, insert the screw into the milled piece as shown. Don't get it backwards; it'll do horrible things, as I discovered. First, insert the screw into the milled piece as shown. Don't get it backwards; it'll do horrible things, as I discovered.
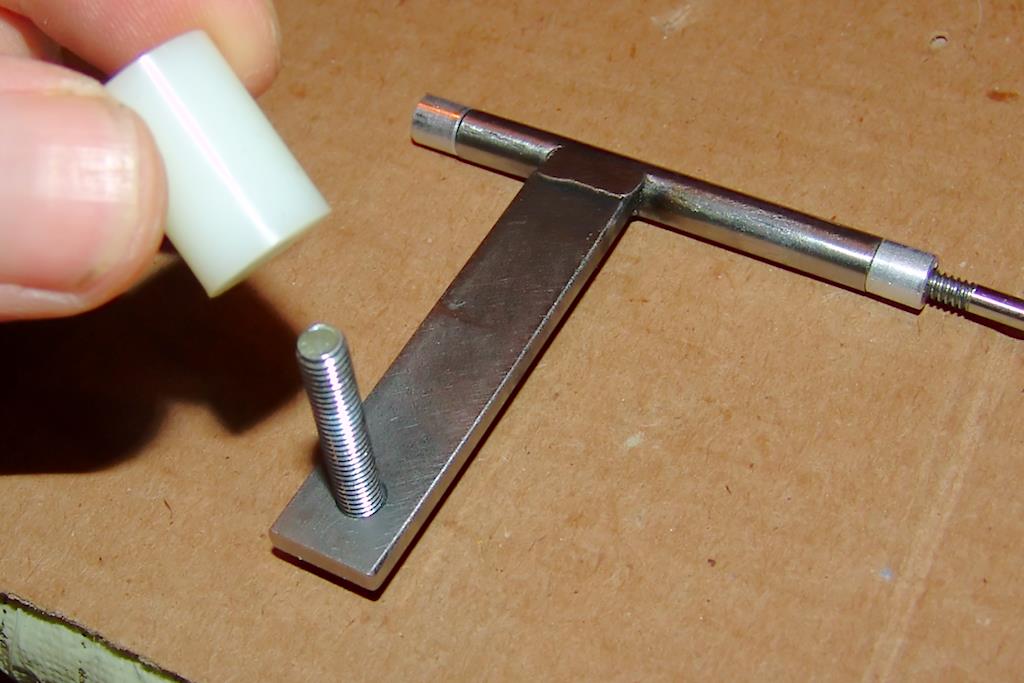 Next, insert the polymer spacer. This is what will actually contact your trigger. Next, insert the polymer spacer. This is what will actually contact your trigger.
 Last, cap it off with the nut washer in the package. The texture is somewhat roughened on the underside, so it shouldn't actually need lock-tite in order to keep it tight and secure. Last, cap it off with the nut washer in the package. The texture is somewhat roughened on the underside, so it shouldn't actually need lock-tite in order to keep it tight and secure.
Step by Step Stock Assembly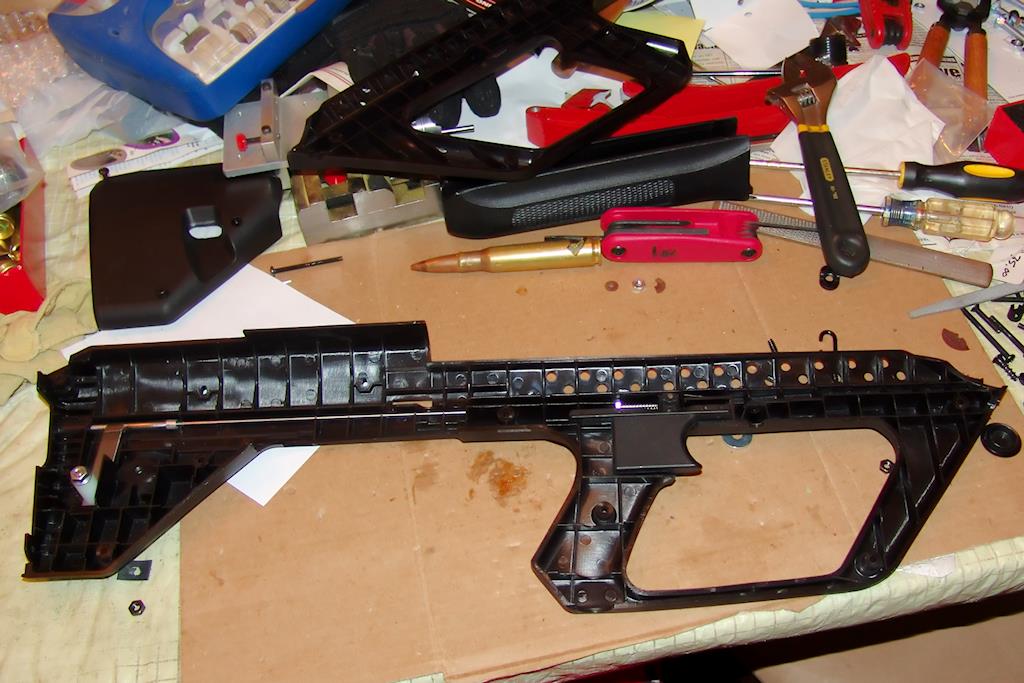 This is the left side of the stock assembly. The Kushnapup stock system consists of three molded plastic pieces; one large piece and two smaller pieces.
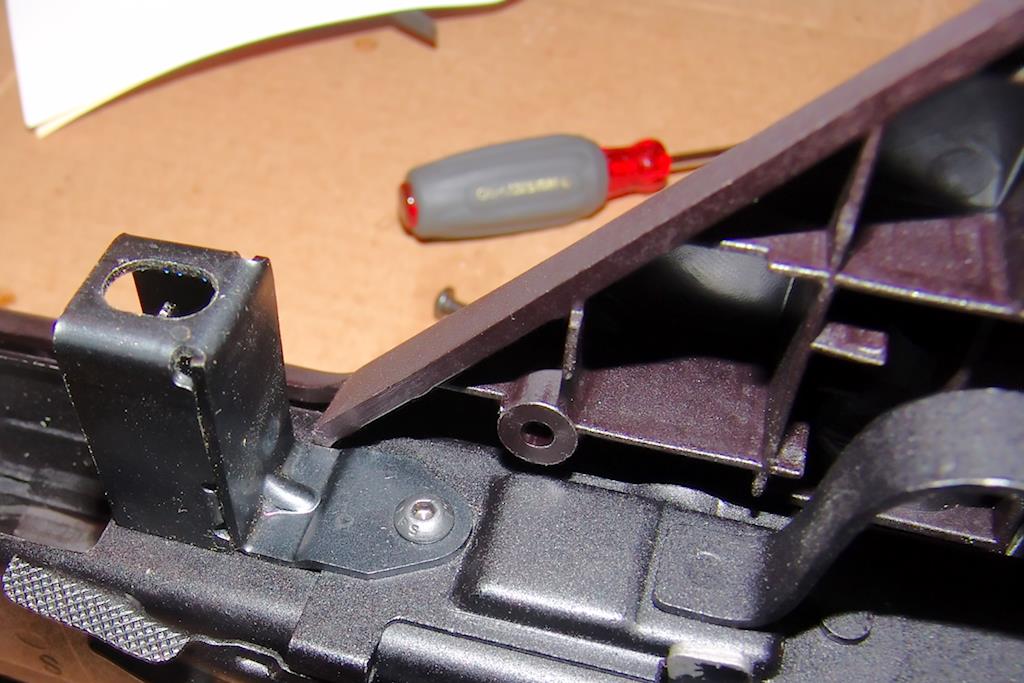
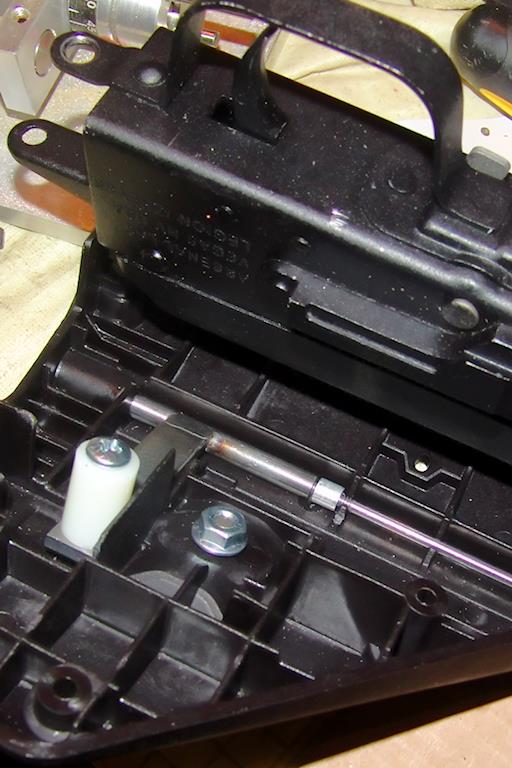
 A close-up view of the rear end of the transfer bar assembly. Notice the small black hole at the end of the stock, which the bar is meant to slide into. I did not notice this at first. Also notice that the rear few inches of the transfer bar are threaded. There are some round nut-like pieces which are screwed down to both sides. It's possible to make some small adjustments to the location of the bar on the trigger by changing where these nuts are at. It's also recommended to lock-tite the nuts in place once you've confirmed that the present location is actually the one you want. A close-up view of the rear end of the transfer bar assembly. Notice the small black hole at the end of the stock, which the bar is meant to slide into. I did not notice this at first. Also notice that the rear few inches of the transfer bar are threaded. There are some round nut-like pieces which are screwed down to both sides. It's possible to make some small adjustments to the location of the bar on the trigger by changing where these nuts are at. It's also recommended to lock-tite the nuts in place once you've confirmed that the present location is actually the one you want.
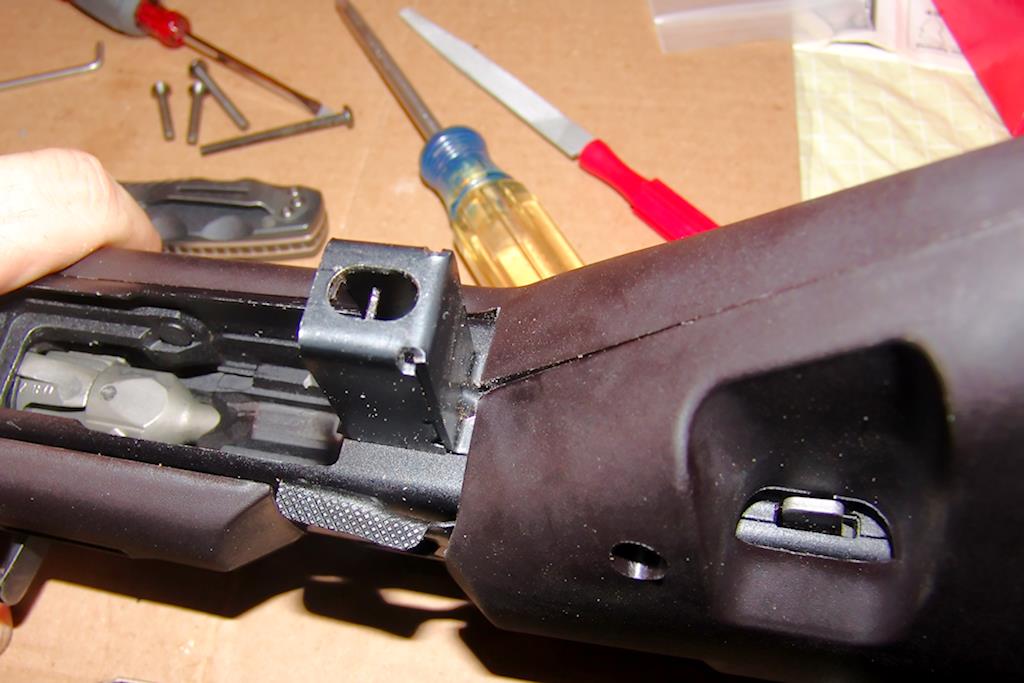
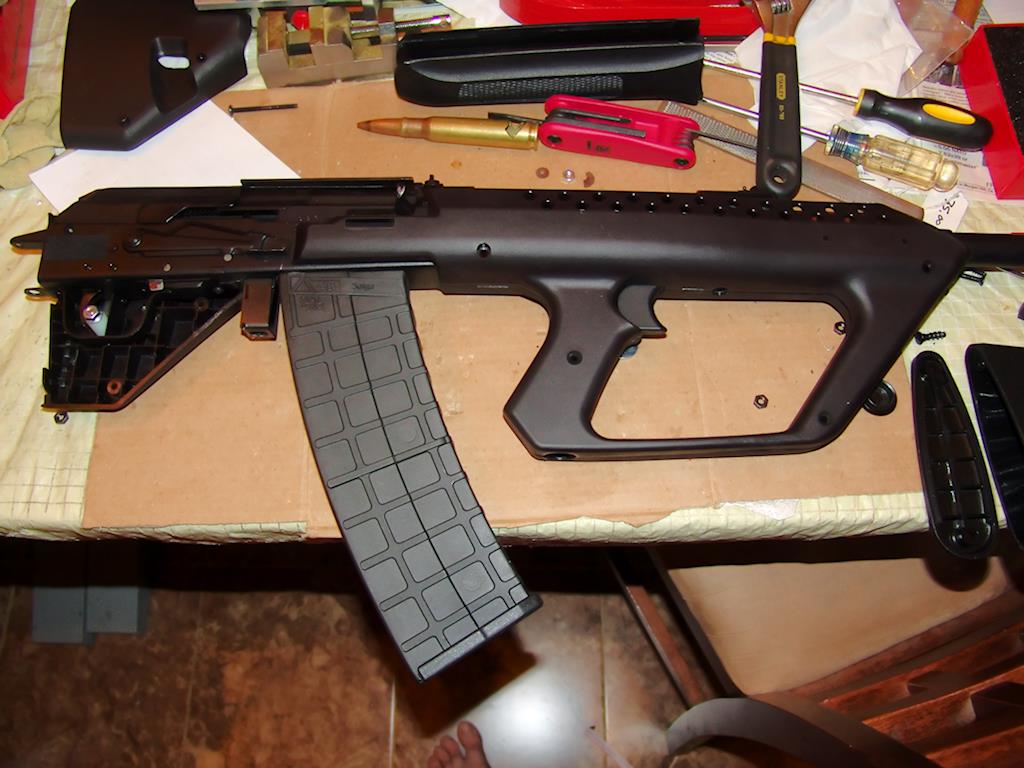
 The Saiga, installed in the stock. The next two pictures are simply detail shots of correct placement.
 Position of the trigger actuator. Notice that the rear stock tang protrudes a considerable distance past the end of the buttstock. It is recommended to to cut off the stock tangs, but I prefer not to make permanent modifications if I can avoid them. Position of the trigger actuator. Notice that the rear stock tang protrudes a considerable distance past the end of the buttstock. It is recommended to to cut off the stock tangs, but I prefer not to make permanent modifications if I can avoid them.
 Another angle view of the transfer bar assembly and trigger. Another angle view of the transfer bar assembly and trigger.
 The front right stock section. This piece serves to cover the trigger assembly and provides the second half of the handguards.
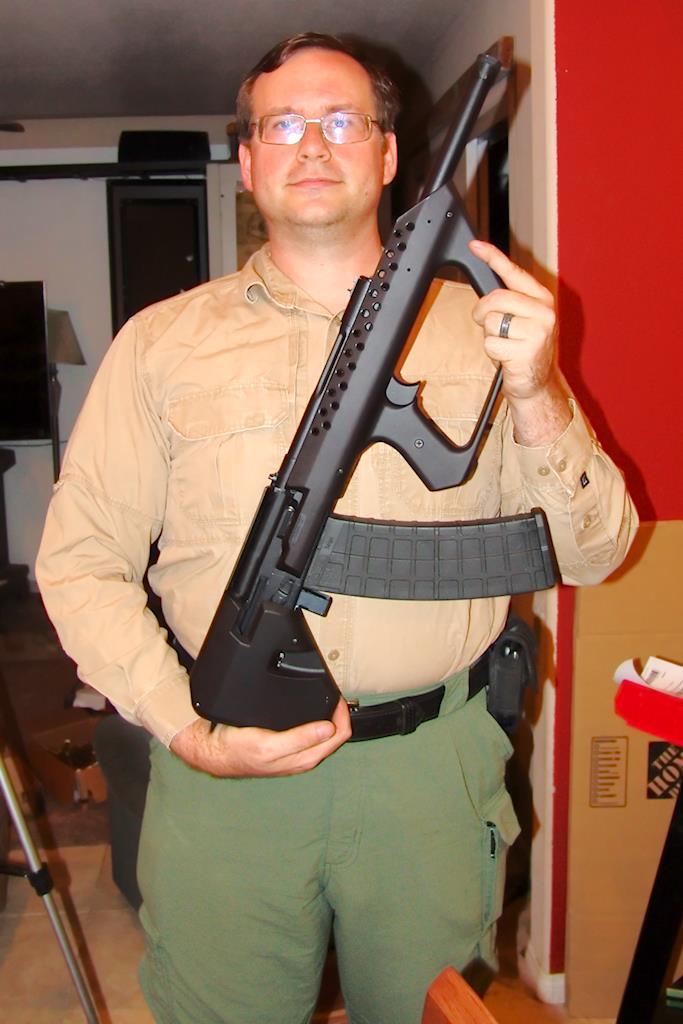
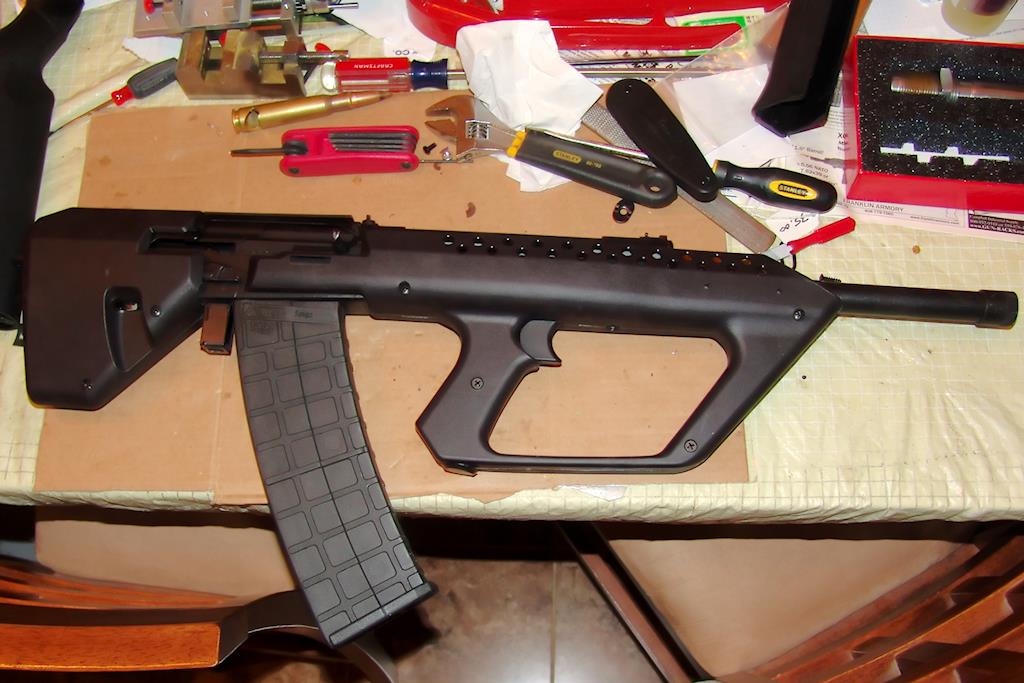 A picture of the completed weapon.
PROBLEM: I put the bolt on the wrong side of the trigger actuator This is the trigger actuator. If you've installed it this way (like I initially did), you've installed the bolt backwards. It should be screwed in from the other side of the milled piece, with the screwed-down washer over it as depicted in the section above. Thanks to J H for spotting this and writing me about it! This is the trigger actuator. If you've installed it this way (like I initially did), you've installed the bolt backwards. It should be screwed in from the other side of the milled piece, with the screwed-down washer over it as depicted in the section above. Thanks to J H for spotting this and writing me about it!
 The circular pattern and scrape below the trigger assembly (white) is from contact with the stock after I had tightened it down. When installed backwards, it protruded too far and scraped the inside of the stock, as well as siezing up the trigger pretty efficiently.
The Gas Adjustment System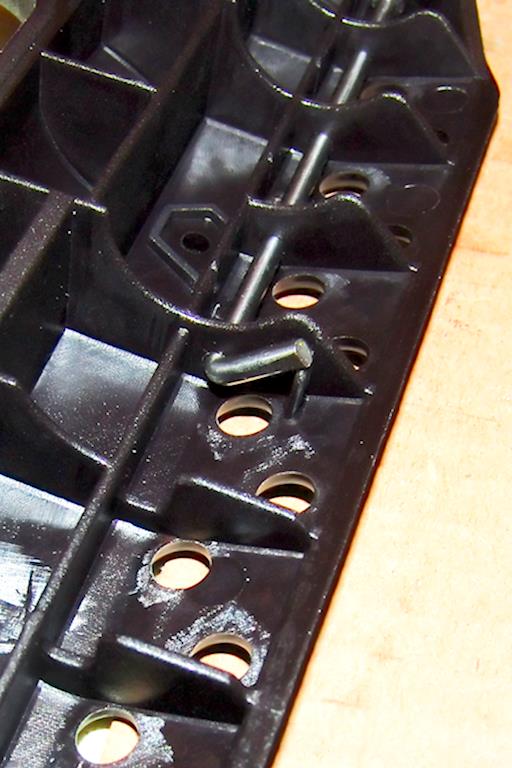 There's a ridge on the inside of the stock positioned such that it prevents the bar from sliding out of position. It's important to note that if you want this to fit properly, this piece should line up with the plunger on the gas system. It will not be possible to pivot this into position once it has been installed incorrectly, so take care to install it in the correct place.
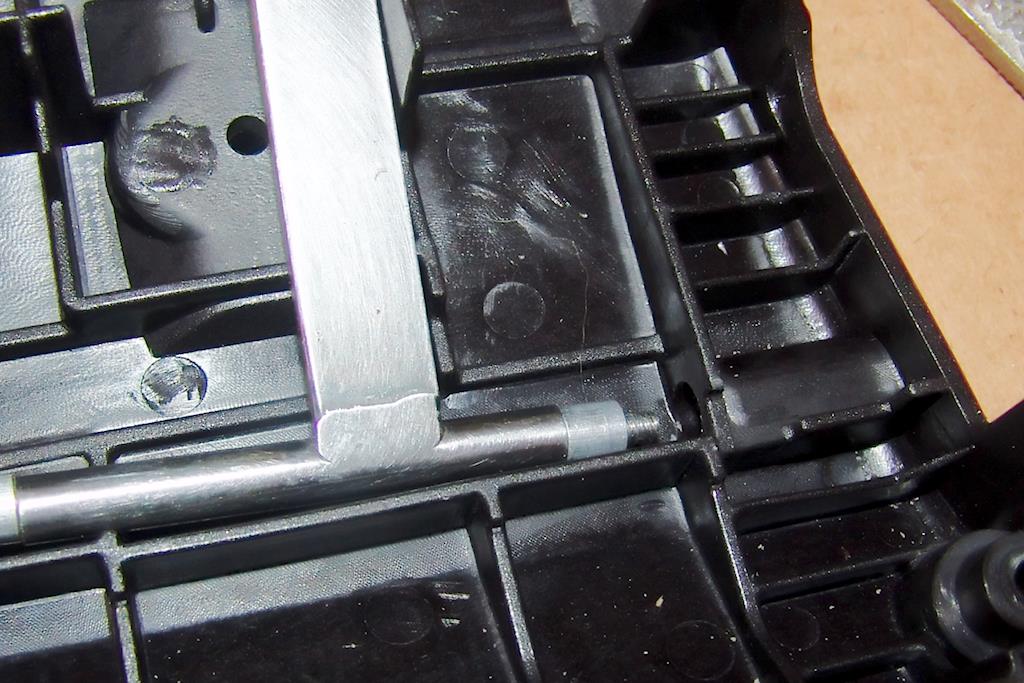
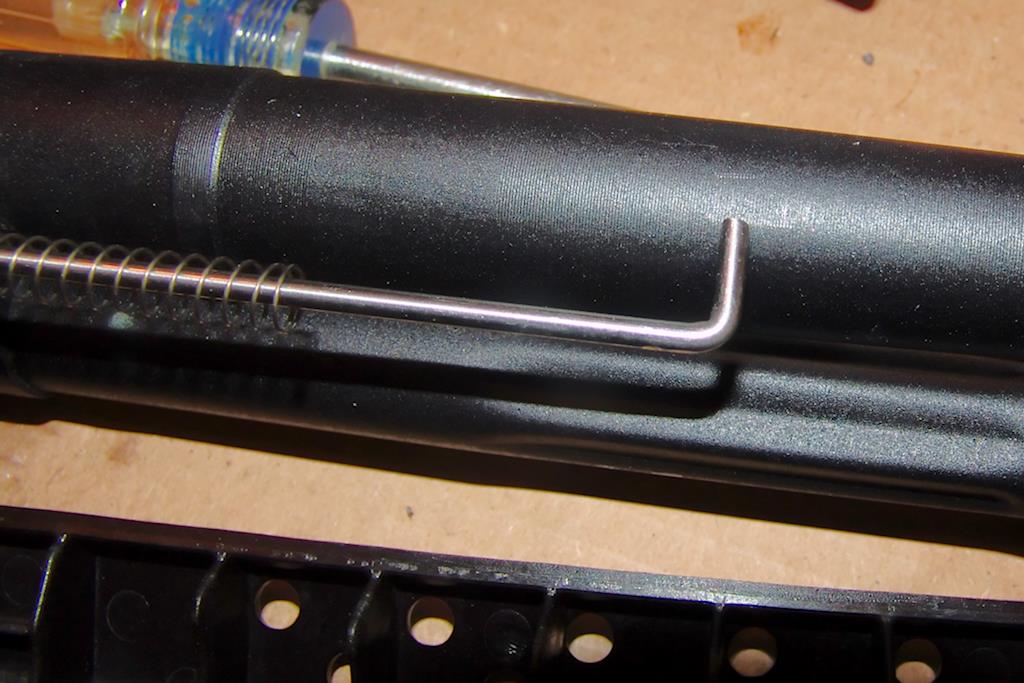
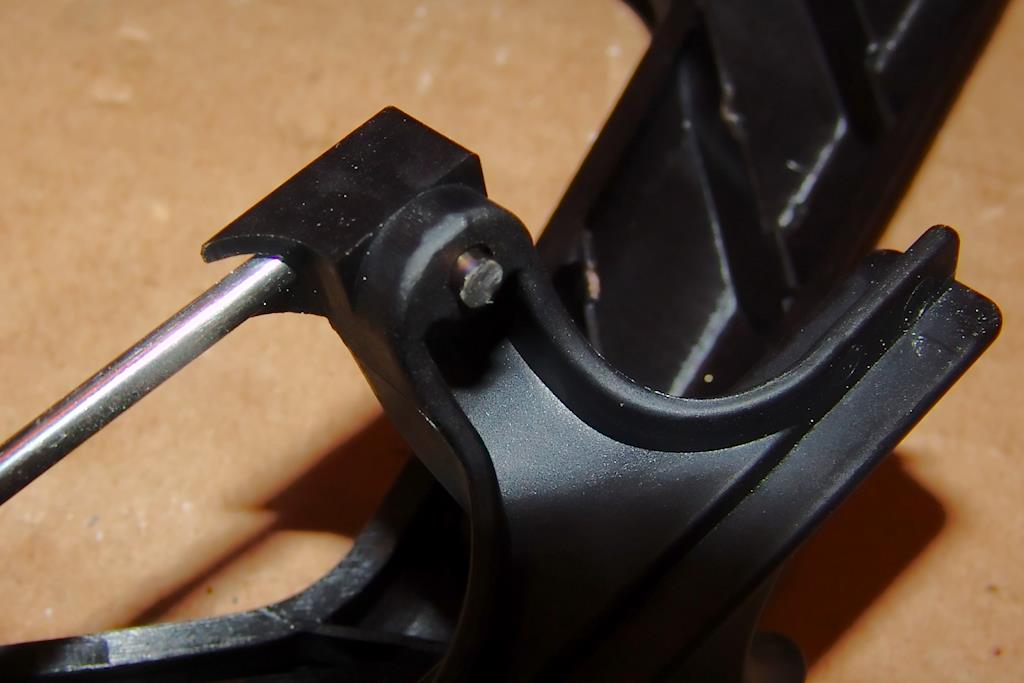
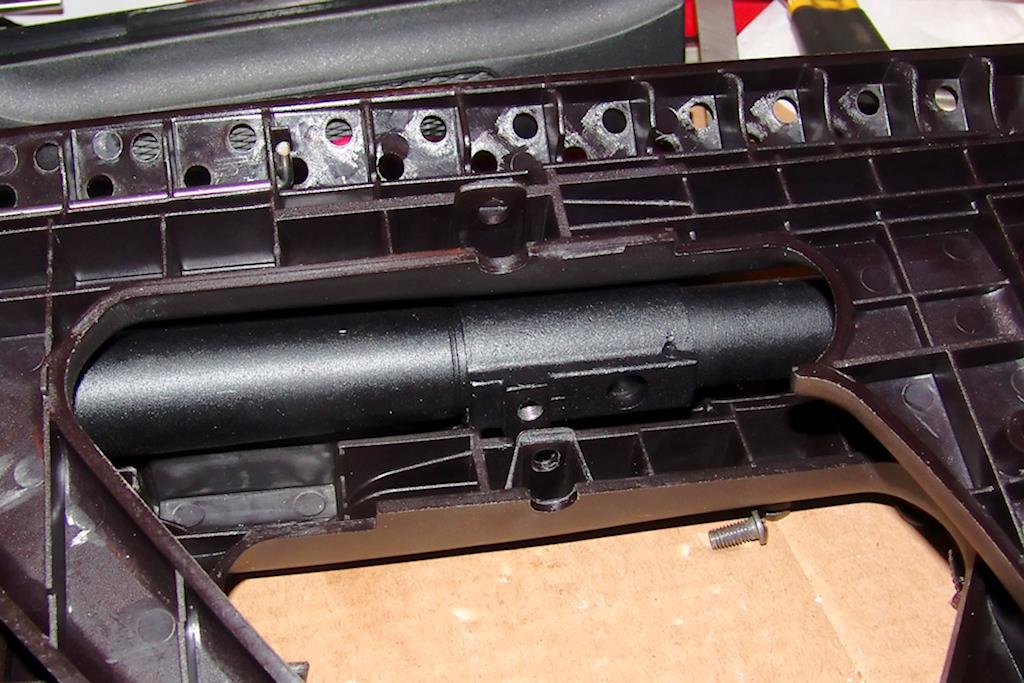
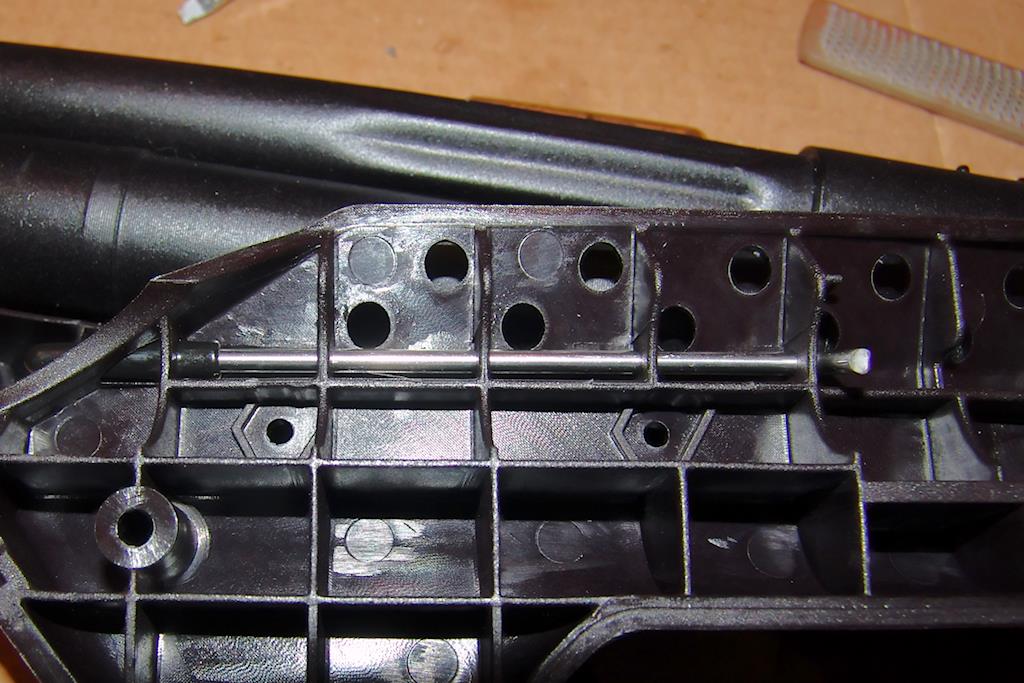 This is an interior view of the stock, near the gas port adjustment button. This steel rod has an L-shaped bend to it (which you can see towards the right side of the rod in the image to the left). This is meant to be positioned right above the detent which keeps the gas system in place, allowing you to press in on the bar's rubber coated tip in order to press the detent on the gas system.
 A different interior view of the gas port button.
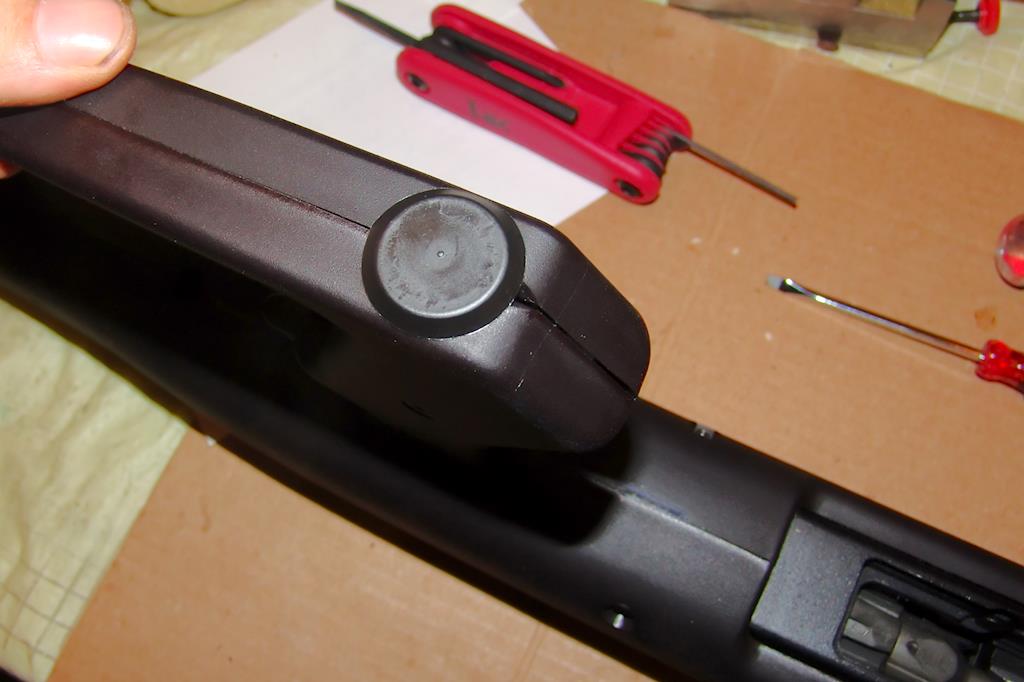
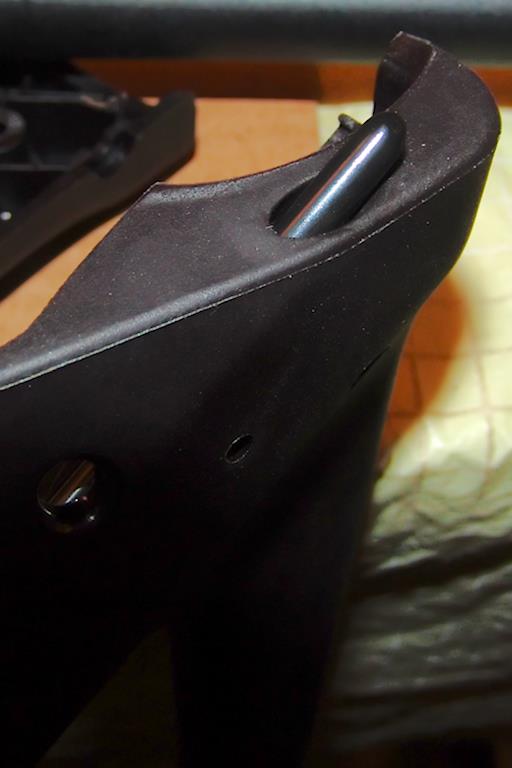 An exterior close-up view of the gas port button. This is on the right side of the weapon, near the front.
 The button is visible above the barrel in this picture.
 Another picture.
The Side Sling Swivel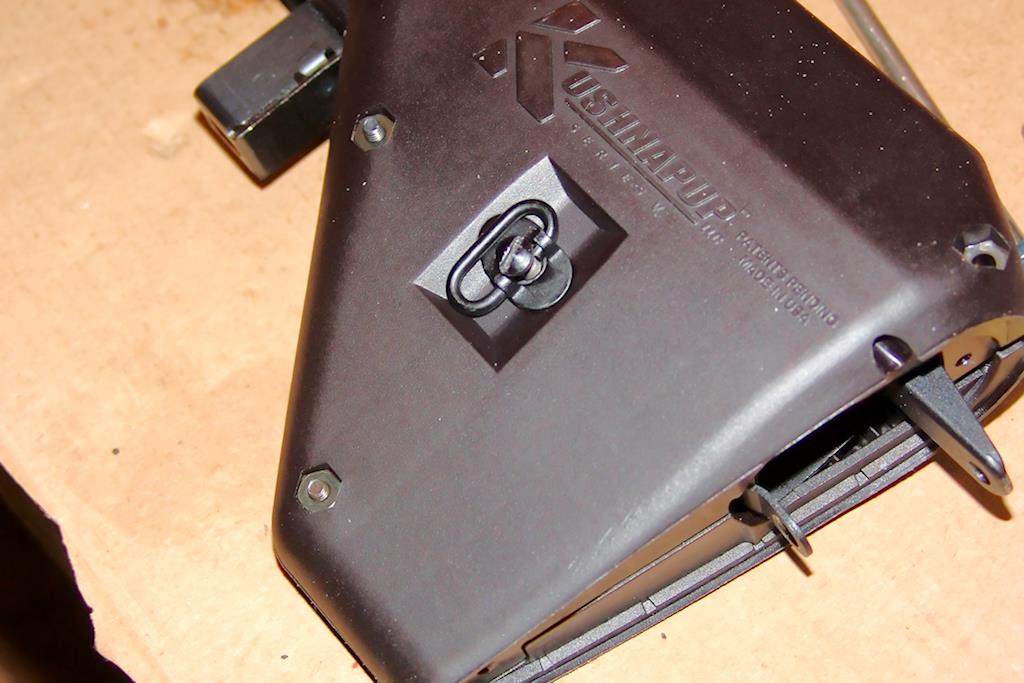 The left rear side of the buttstock, with the stock swivel installed. Unfortunately, when I installed this it intruded too far into the stock and my Saiga-12 receiver was scratched when I tightened it down.
 Another view of the stock swivel.
PROBLEM: Used incorrect part, which protruded inside, scratching receiver About 2/3rds of the way between the trigger and the forward part of the trigger guard, you'll notice a rather large scratch. This came from tightening down the stock with the sling swivel installed. The issue is that I mistook the washer in the instructions for this particular nut, which is sort of a nut and washer in one piece.
 The offending nut, opposite of the place where it scratched the receiver. I shall repeat this experiment later with the correct nut and washer; as of the present writing, I just don't have the sling swivel installed.
A Plug and Its Hole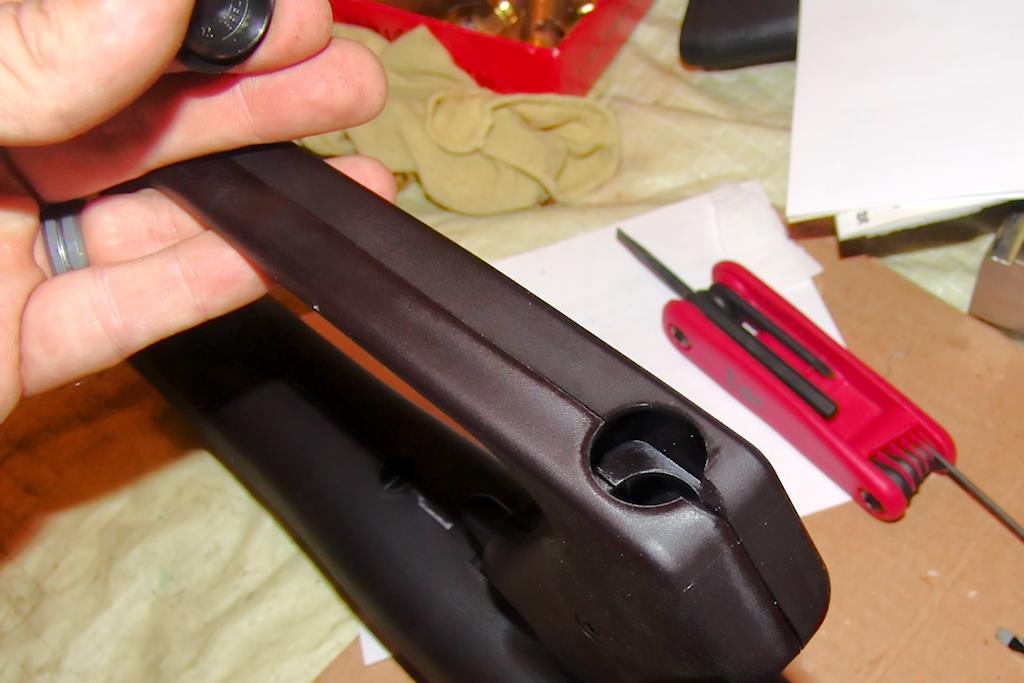 A hole underneath the stock guard. I'm not sure what it's doing here; perhaps this is just an artifact of the molding process which produced these stocks.
 It does, however, come with a plug for the hole.
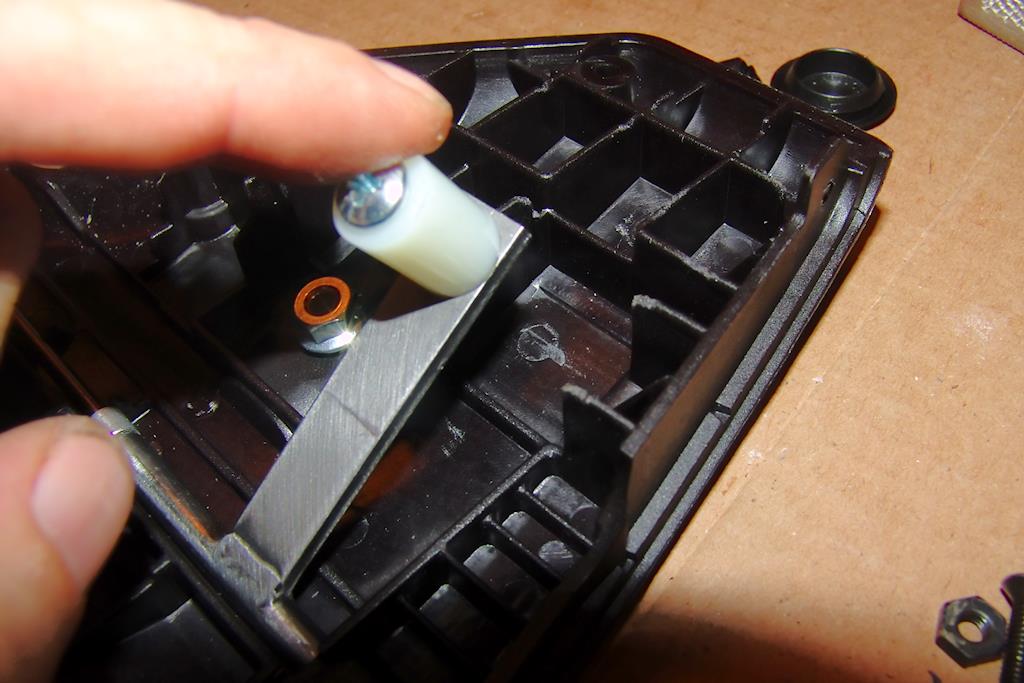
PROBLEM: Spring possibly at risk of sliding through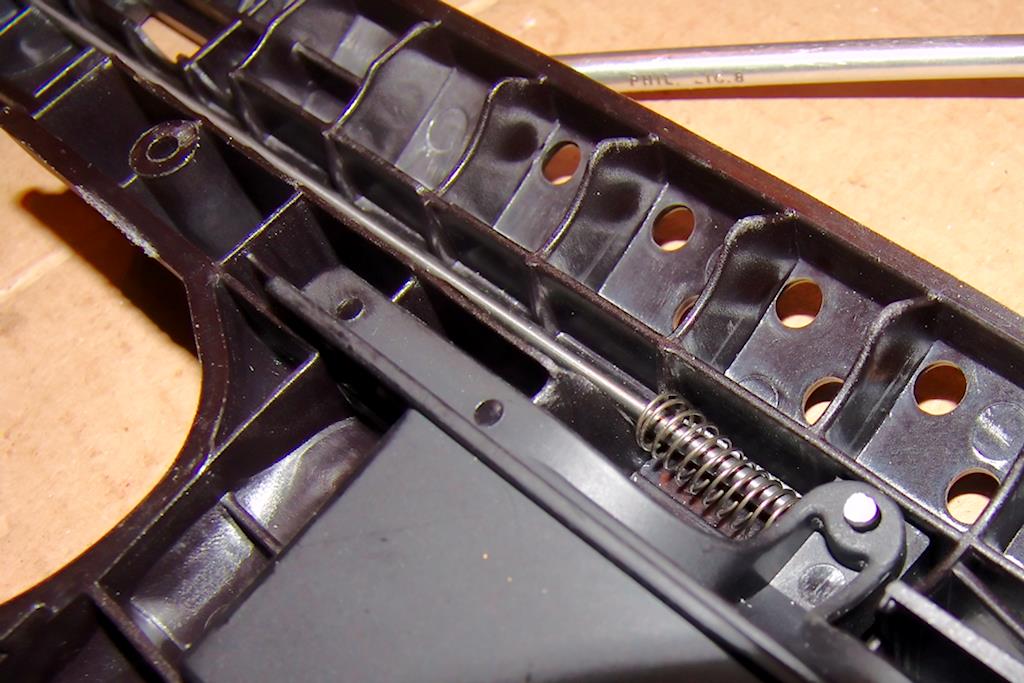 I'm not entirely confident that this is an issue, but it made me nervous that there was nothing to retain the spring and ensure that it couldn't slip through as the trigger assembly is actuated. The instruction manual didn't say to do this, but there were a couple of spare nuts in the package which were the perfect size to capture the spring and ensure that it couldn't fall through this gap as it's being used and slowly get mangled, coil by coil.
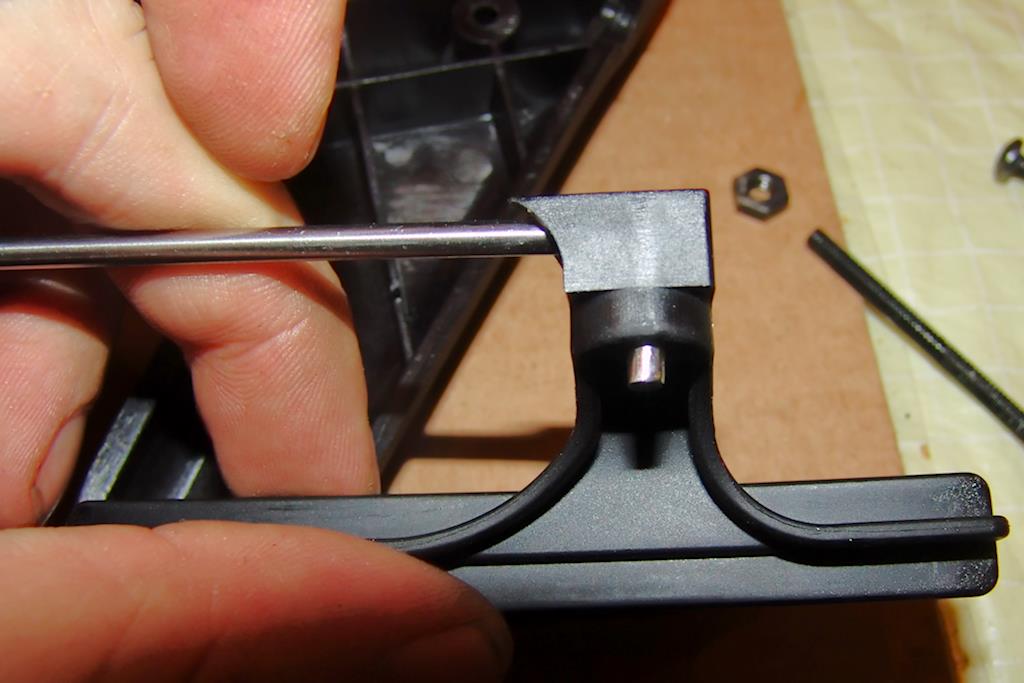
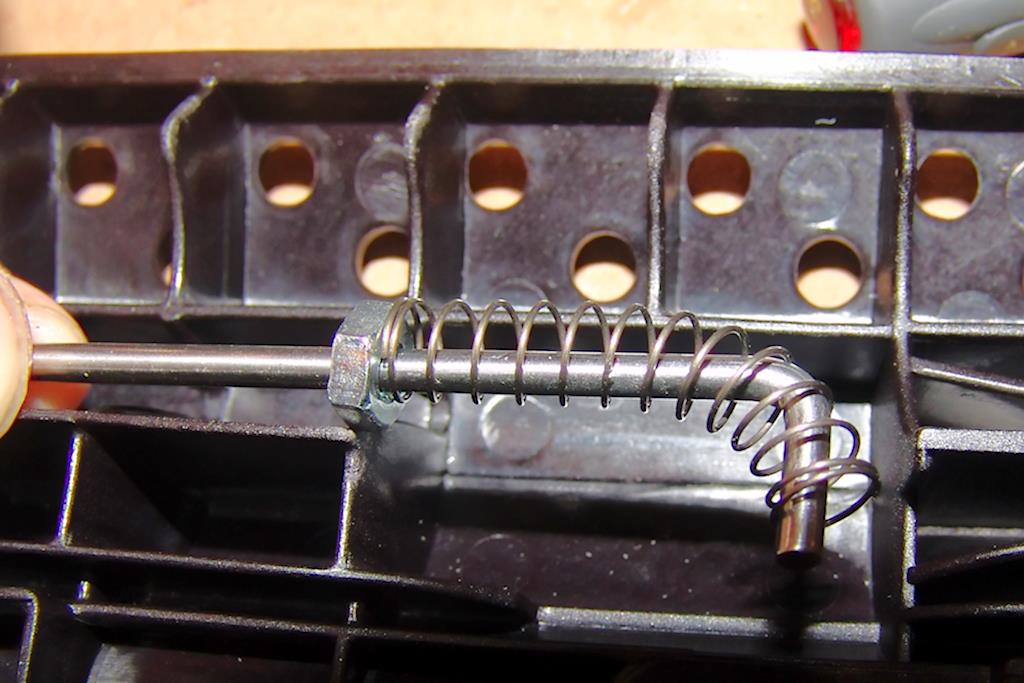 Installing the nut before the spring. This ensures that the spring is captured by the nut, as the nut is too big to fit through the area I'm placing it at and it will provide a nice, uniform surface for the spring to contact. Technically, a small washer of just the right size would be better.
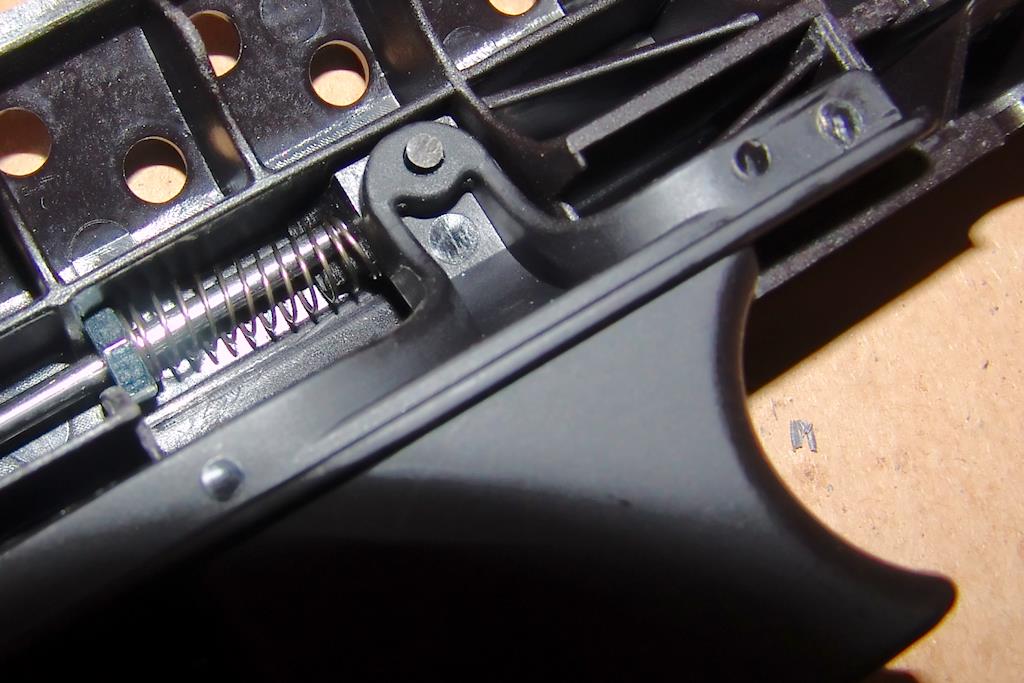
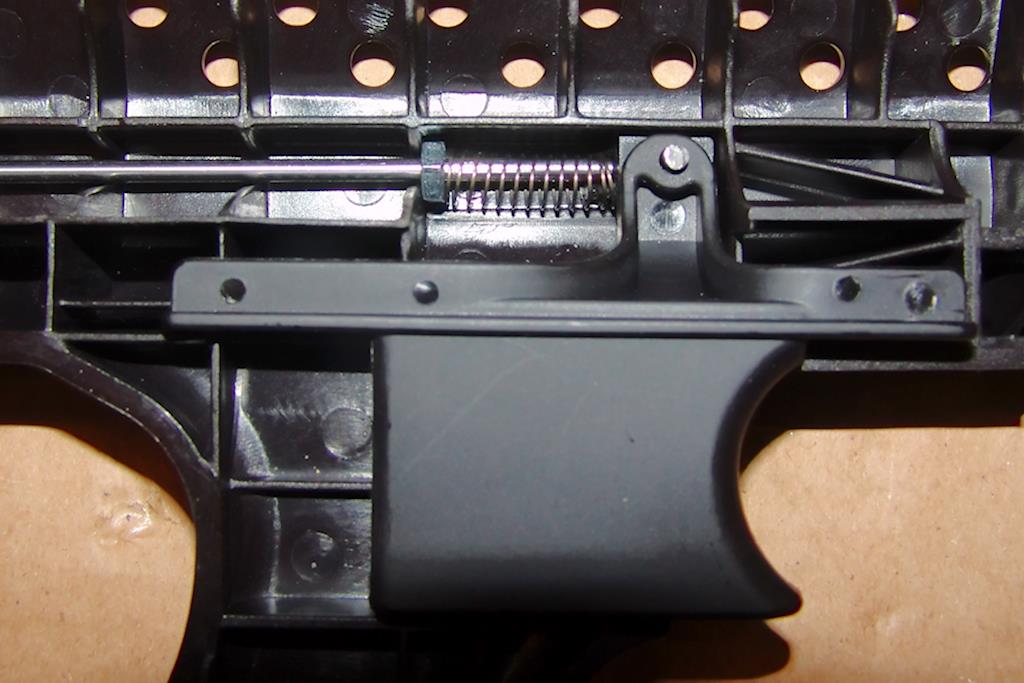 The entire assembly in place. The return spring provides a very pleasant trigger reset.
PROBLEM: Trigger transfer bar scratching barrel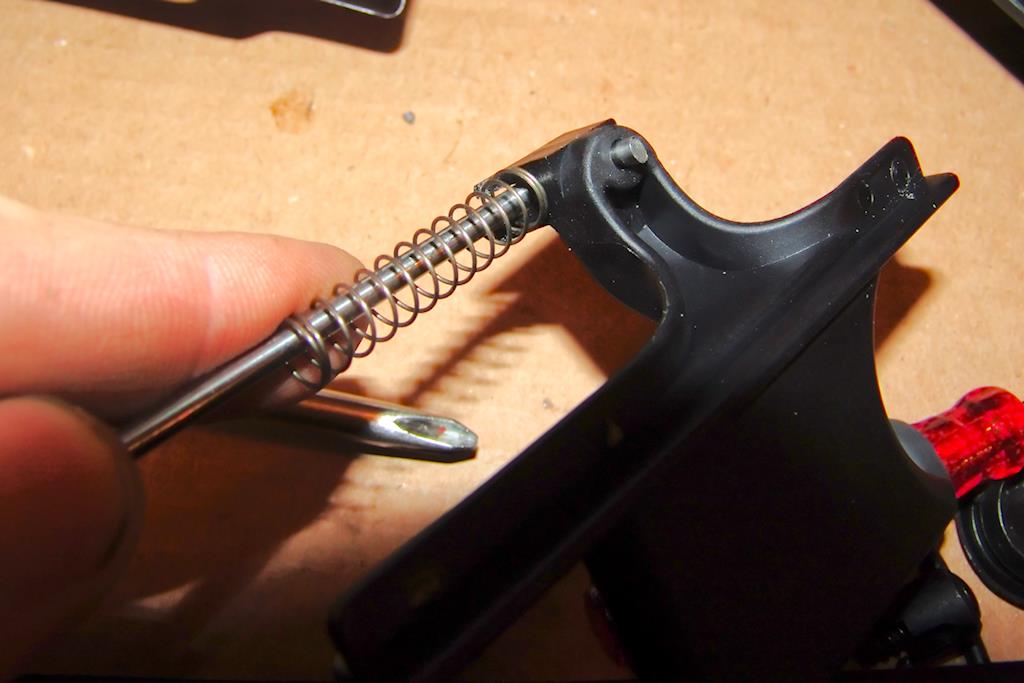 Installing the spring assembly onto the trigger assembly. Note the degree of
protrusion through the hole here? That left a scratch on the side of my barrel which would have gotten very nasty over time.
Installing the spring assembly onto the trigger assembly. Note the degree of
protrusion through the hole here? That left a scratch on the side of my barrel which would have gotten very nasty over time.
 The actual scratch, barely visible but this is only from a couple of trigger pulls. This shows that the trigger transfer bar iis slightly too long for the amount of clearance left over after firmly screwing the stock together. Directly above the edge of the transfer bar in this picture, is the scratch which was being left on my barrel. Not only is it doing damage to the barrel, but it results in a trigger with drag to it, which siezed up as the stock was tightened together. But do not be concerned; this is a quick fix.
 Note, in this picture, that the transfer bar has a considerable amount of free play after having already gone through the trigger, and the light scratches being left on the Saiga show that it was just barely too long. So we won't lose anything by removing a small amount of metal, and the fact that the scratches are shallow means that we need to make sure it's just a small amount of metal.
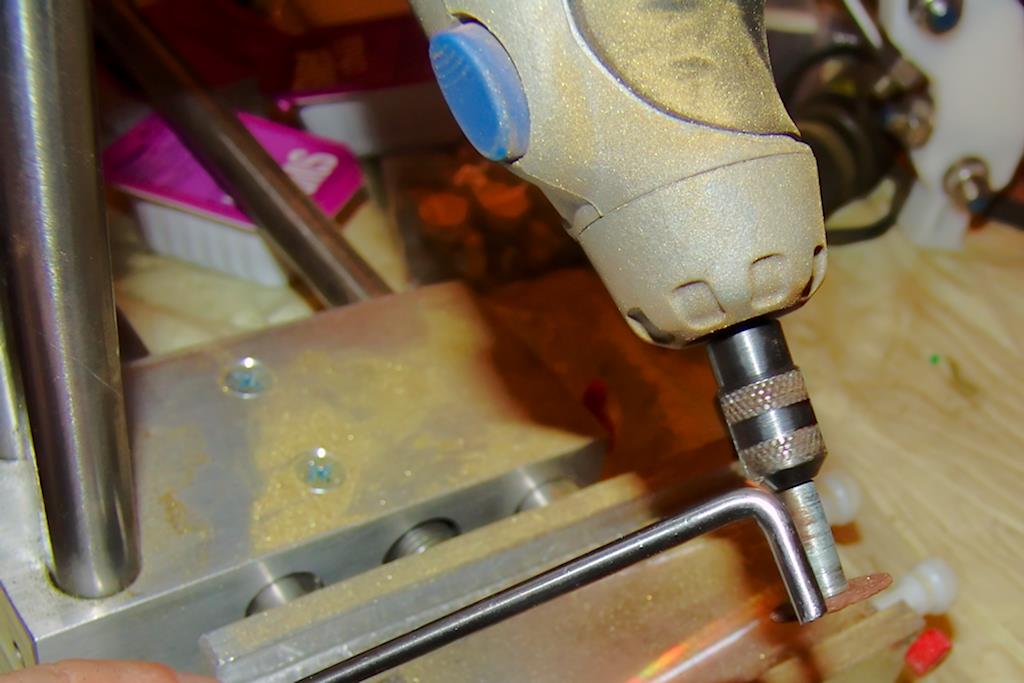 To shorten the rod, I used a dremel tool. You could also use a file, bench grinder, or any other means of shortening the rod reliably. Do not remove too much from the bar though; to do so could damage your ability to pull the trigger.
 The new, shortened rod doesn't protrude nearly as far as it used to.
 This is the trigger assembly as it presently stands in my Kushnapup. There is no binding or interference whatsoever on the trigger pull.
Installing the Buttplate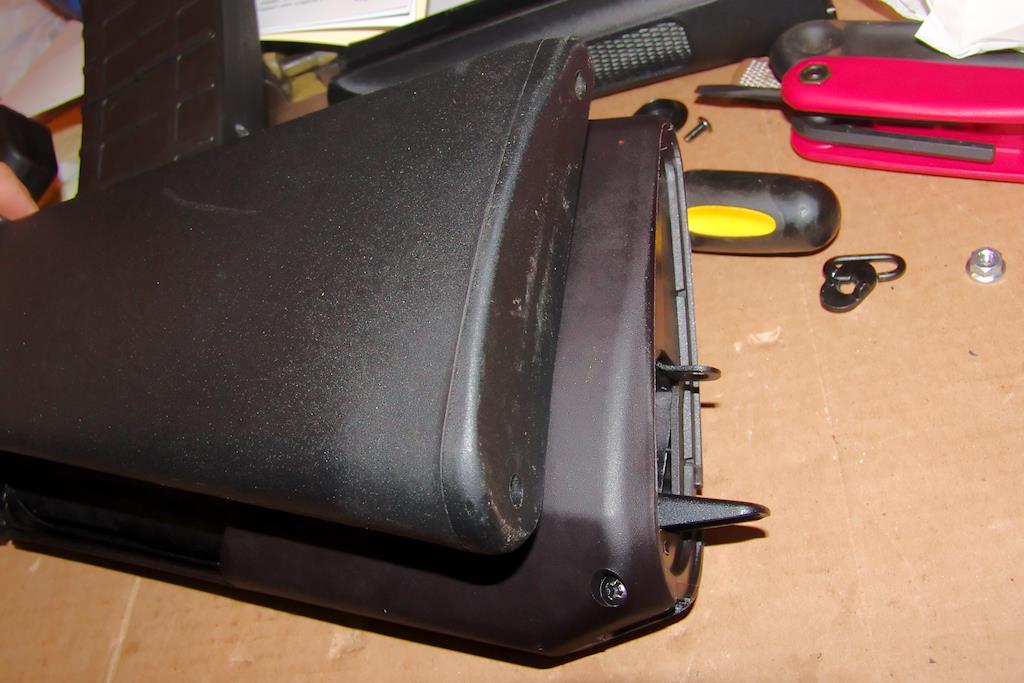 The rear of the Kushnapup, compared to the rear of the Saiga buttstock. Notice that the Kushnapup's buttplate hole looks pretty much identical to the one for the original Saiga stock. This is so that you can actually use the Saiga buttstock on the Kushnapup - you'll just have to cut the rear stock tang off to do so.
 The buttstock plate, removed from the Saiga and showing where it would install. I can't bring myself to cut off the stock tangs, so I haven't yet decided what I'm going to do for a rear buttplate. I will probably get some manner of long rubber pad, cut out slots for the tangs as appropriate, and install that instead of cutting my stock tangs.
Miscellaneous Observations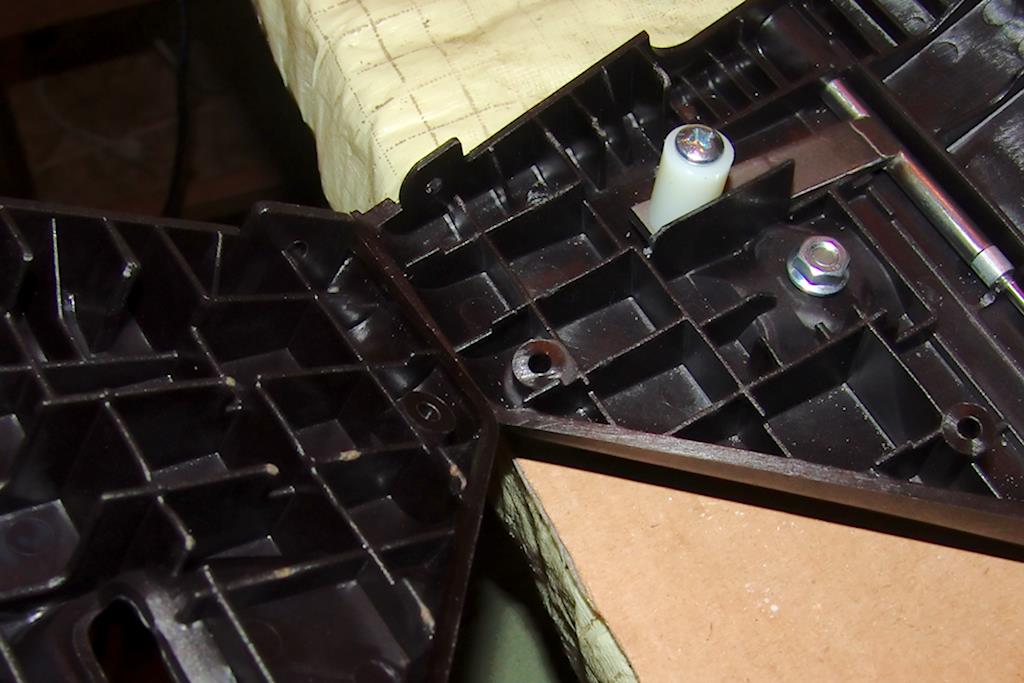 Note the horizontal and vertical grid layout of the reinforcement ribs. As opposed to a hollow stock, the Kushnapup has a series of squares with interlocking "stair step" angles to produce a rigid, inflexible stock which feels more solid than typical AK or Saiga polymer stocks, which are typically hollow on the inside without reinforcement ribs.
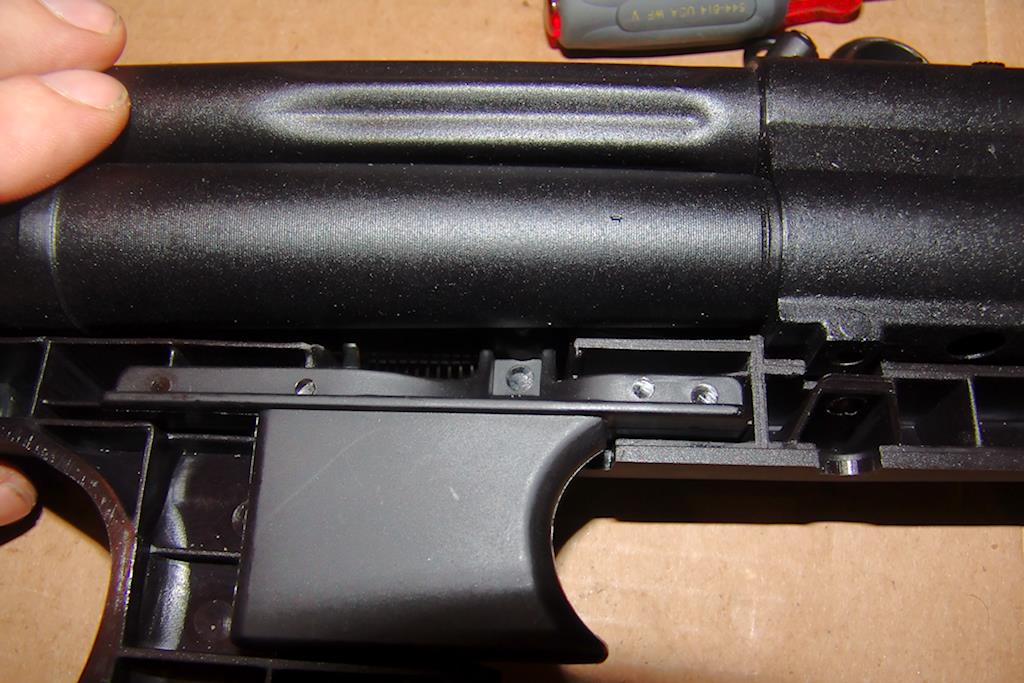 The trigger, installed, with the Saiga above it. To the right is a slot which the two halves of the stock interlock over. At least on my model of Saiga, there's a threaded hole leading to the frame here.
 This is the underside of the Saiga-12's barrel. The threaded hole is right where the handguard sling swivel used to screw through the handguard and into the barrel band. In the Kushnapup stock, there are two overlapping tabs over that hole, so that the screw provides a connection between the two handguard pieces and the barrelled action.
In ConclusionThe Kushnapup is a nice, solid piece of hardware which does not require installation by a gunsmith. It is not however a drop-in installation, and like most things worth doing, requires that you do it right. I am confident that anyone with a file and a cautious mindset will have no problems with this installation, particularly given that I've identified a large number of potential "gotchas" in this article already. The overall length is shortened drastically, and if I ever move out of California, I may decide to see what happens if I file the appropriate paperwork so that I can put a shorter barrel on this weapon. This article may be updated later on with more pictures of the completed weapon, some range reports, and naturally the application of locktite where appropriate. And if I remember it, I may even take before/after trigger pull measurements. -- SeanNewton - 11 May 2012 |

Topic revision: r2 - 25 May 2012 - SeanNewton


Ideas, requests, problems regarding TWiki? Send feedback