TWiki> Gunwiki Web>ArticleIndexByGun>RefArFamily>ProcInstallPhase5EBR (01 Jan 2012, SeanNewton)
Installing a Phase 5 Extended Bolt Release (EBR)See also: Installing the AR-15 Bolt Catch Assembly Whenever I read EBR, I think "Evil Black Rifle" - a phrase which has come to describe just about any non-sporting, tactically focused rifle in the American market. However, Phase 5 TacticalPros and ConsThe advantage of Phase 5's design over Magpul's and other clones, is that it's one solid piece of metal (hence the word "monolithic") - there are no screws or pads to install, and nothing to come loose. However, its disadvantage is that because it's not a bolt-on item, it requires that you remove your existing bolt catch. As such, although this isn't a difficult thing to install, if you KNOW you're going to want to install this bolt release on a new build, you may as well not go through installing your bolt catch first. Like any extended bolt catch, the EBR has significant play to it. You'll notice that there's a quarter inch or so of travel, depending on the dimensions of your AR-15 receiver's bolt catch slot.ImpressionsWhile this article is primarily about installing an EBR, I'll write down some impressions of it once I've had a chance to use it at the range.Installation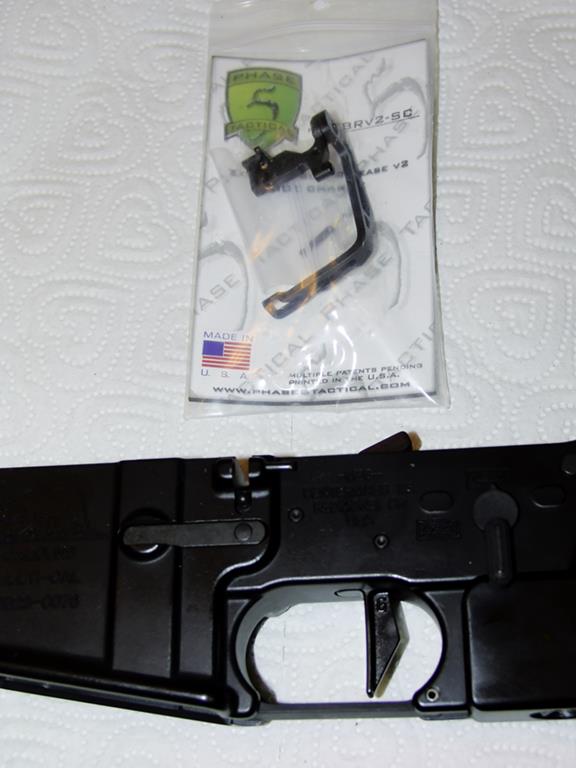 The EBR in its packaging. Note that I've already punched the standard bolt catch pin loose from the AR receiver, leaving the detent and spring in place. The receiver is ready to accept the EBR.
 The EBR outside of its packaging. Note the machining marks along the edges, and how the grain bends with the curve.
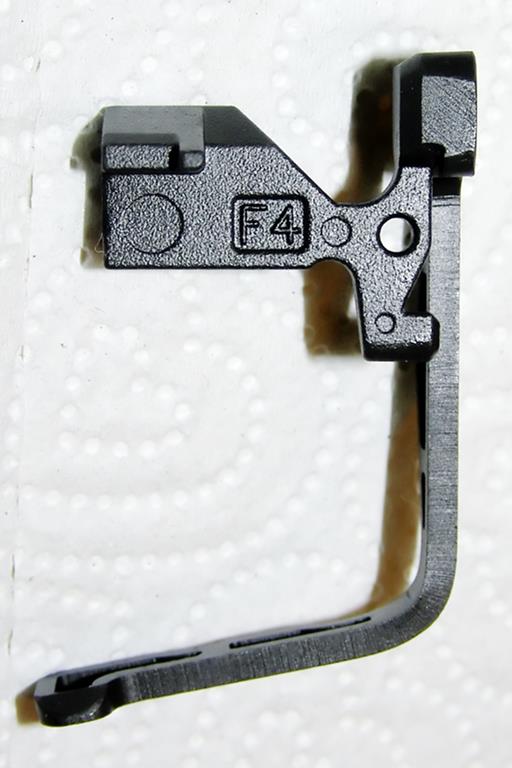
 A different view of the EBR before installation. Notice the lightening cuts in the extended release.
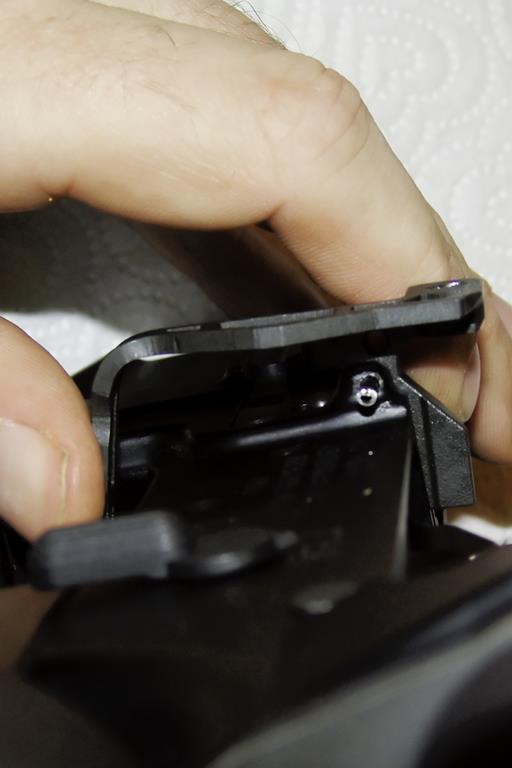 Installing the EBR - getting it lined up with the roll pin before punching it in. It installs just like a normal bolt catch; no surprises here.
-- SeanNewton - 01 Jan 2012 |

Topic revision: r1 - 01 Jan 2012 - SeanNewton


Ideas, requests, problems regarding TWiki? Send feedback