TWiki> Gunwiki Web>RefHandgunHolsters>GearSerpaL3Sig (17 May 2012, SeanNewton)
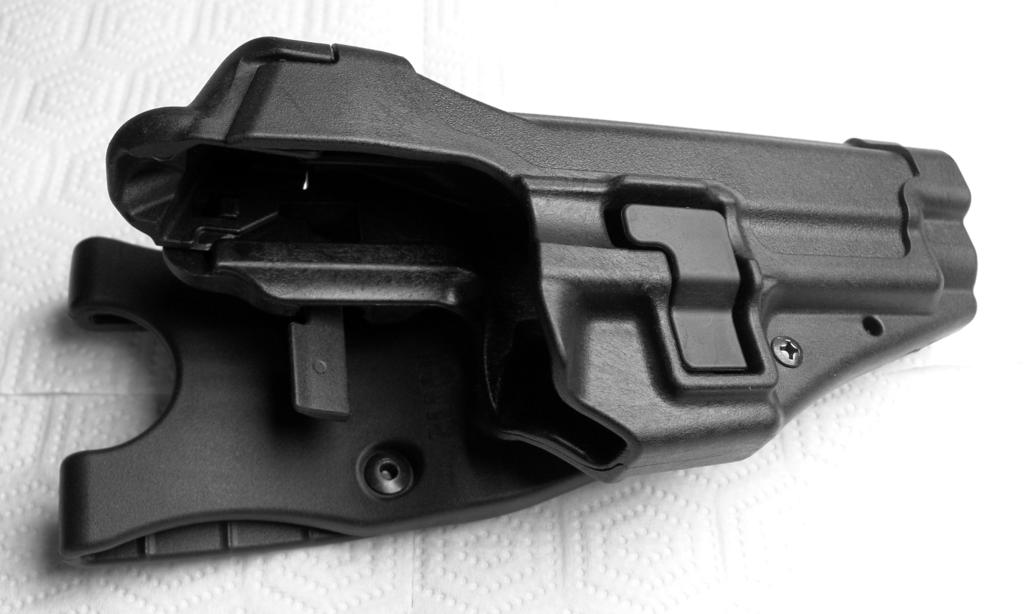
Blackhawk's Serpa Level 3 Sig Retention HolsterSee also: RefBlackhawk and RefSerpa for related information I noticed Serpa holsters for the first time after getting marginally involved in open carry activities in California. Various folks have cautioned the open carry community about anti-gun activists who may try to grab open carriers' weapons at group events to prove that open carry was dangerous to society and such. With these concerns percolating in my head, I really noticed it when I came across a Serpa holster at the next gun show I was working at. The mechanism immediately appealed to my gadget-geek sensibilities, and it infected me with a dire need to research Blackhawk's entire line of retention holsters. I'm glad that I didn't just buy the first one I saw at the show, because in my research I learned that BlackhawkDrawing a Weapon from the Serpa Level 3 HolsterWith regular practice, your draw reflex can be conditioned to work naturally with the Serpa holster, and the habits formed to draw a gun with the Serpa won't cause any harm if they're carried over to a non-Serpa holster. The level 2 locking mechanism (all that a basic Serpa holster has) is pretty reflexive, and it's very easy to train yourself to use it. Your trigger finger, placed where it should normally reside during a draw (on the frame of the weapon above the trigger), will automatically trigger the holster's primary release. When your weapon is clear of the holster, your finger will move inward into contact with the weapon's frame. The level 3 mechanism does indeed require more practice, and must be activated before you start to draw. However, current training dictates that you grip your gun firmly before you draw it, which means you'll trip the thumb switch as you do so. I personally found that it required some thought, but that was when I thought of it as a thumb-activated button and not as an automatic feature when gripping the pistol. I will update this when I've done some practice draws using this method. At any rate, if you don't feel comfortable with the level 3 system, you can leave the level 3 lock disengaged and the holster will function as a level 2 holster. Prior to taking the pictures below, I removed the mount from the holster so that you can see the level 3 release. The mounting mechanism is also of great interest in and of itself, and is covered in the configuration section farther down. This is the inside view of the holster, with my Sig 229 locked in place. This is the inside view of the holster, with my Sig 229 locked in place.
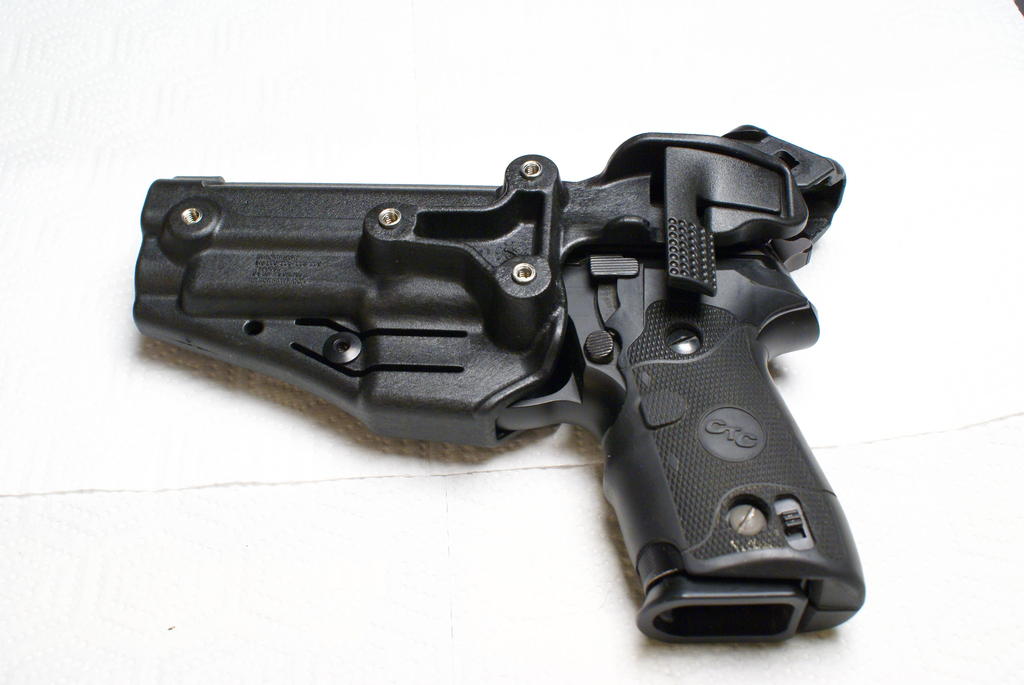 In this picture, the release button has been pressed, causing the rear locking flap (the level 3 lock) to release via spring tension. If you don't see it, look at the weapon's hammer, which the cap previously covered. The flap is directly above the hammer. In this picture, the release button has been pressed, causing the rear locking flap (the level 3 lock) to release via spring tension. If you don't see it, look at the weapon's hammer, which the cap previously covered. The flap is directly above the hammer.
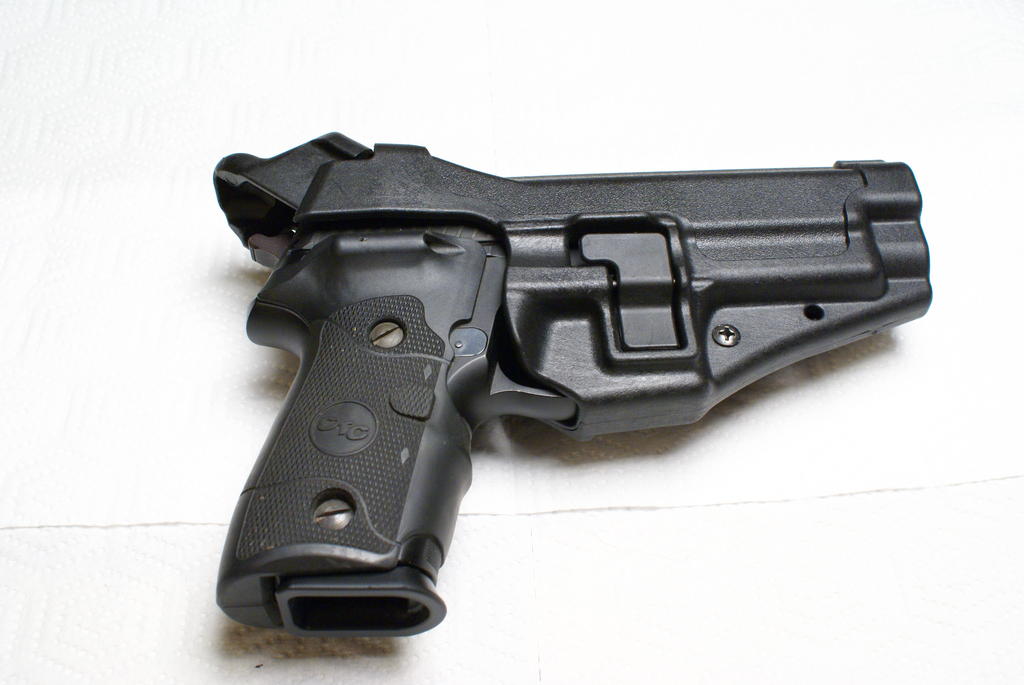 The pistol and holster have been flipped around, in order to permit access to the primary (level 2) release. You will notice that my Sig is equipped with Crimson Trace grips, and the Serpa holster doesn't interfere with the laser diode (located just above the upper grip screw) at all. The pistol and holster have been flipped around, in order to permit access to the primary (level 2) release. You will notice that my Sig is equipped with Crimson Trace grips, and the Serpa holster doesn't interfere with the laser diode (located just above the upper grip screw) at all.
 In this picture, I'm pressing the primary release. This is a lever which lifts the locking tab that clamps onto the trigger guard. It's spring loaded, so unless you simultaneously press the release and pull on the weapon, it won't come out of the holster. In this picture, I'm pressing the primary release. This is a lever which lifts the locking tab that clamps onto the trigger guard. It's spring loaded, so unless you simultaneously press the release and pull on the weapon, it won't come out of the holster.
 While keeping the release button pressed, the pistol is pulled out of the holster. It doesn't have to travel very far (just a fraction of an inch) before you no longer have to keep the release pressed. While keeping the release button pressed, the pistol is pulled out of the holster. It doesn't have to travel very far (just a fraction of an inch) before you no longer have to keep the release pressed.
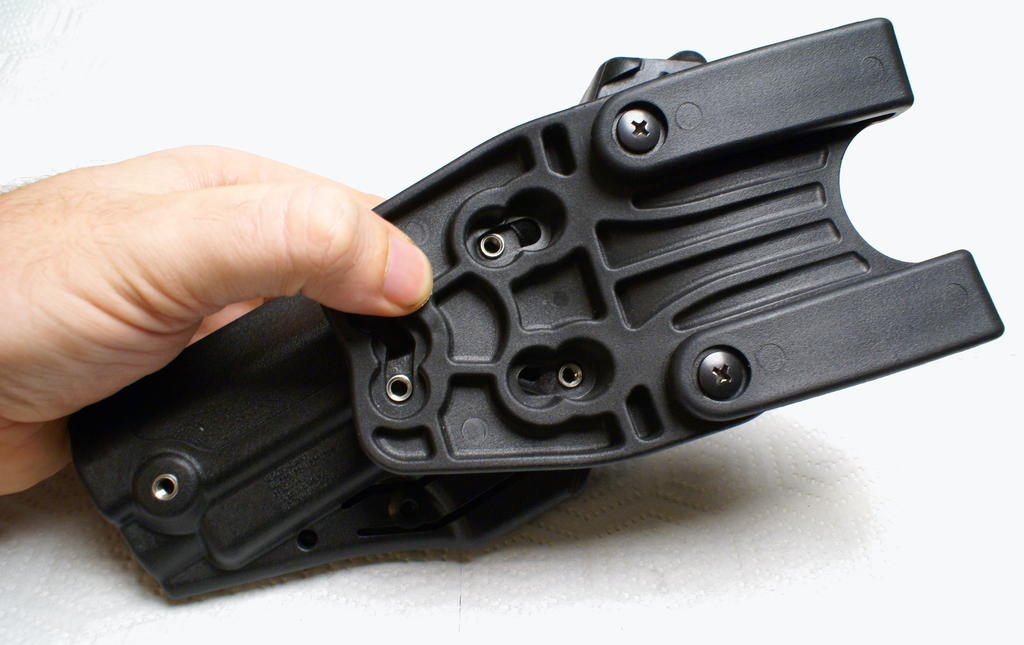
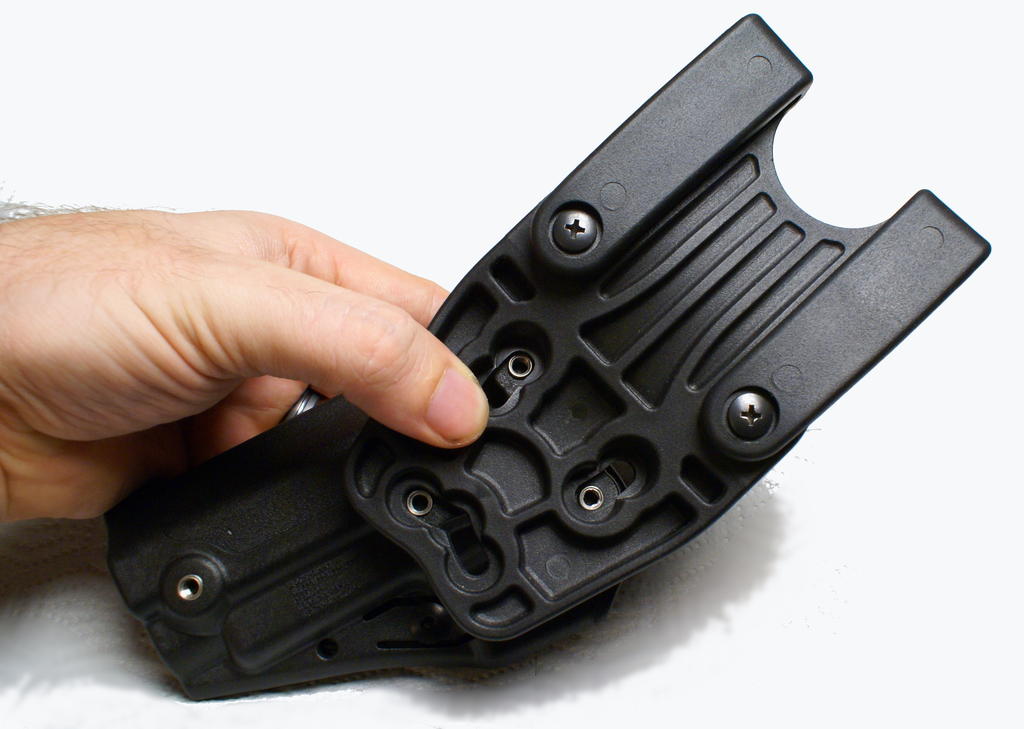
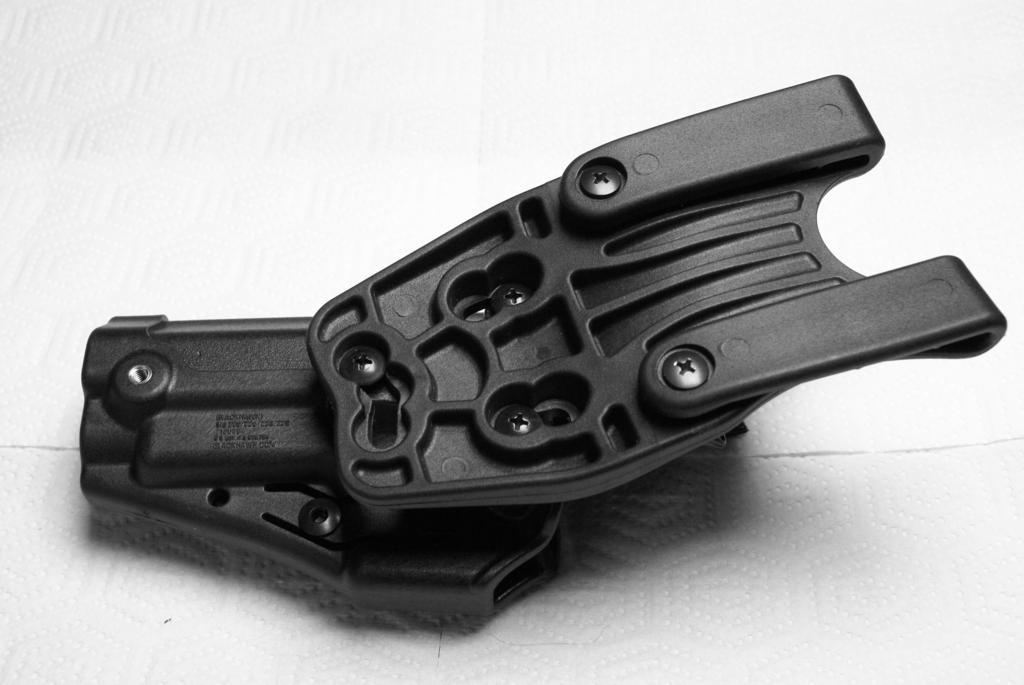
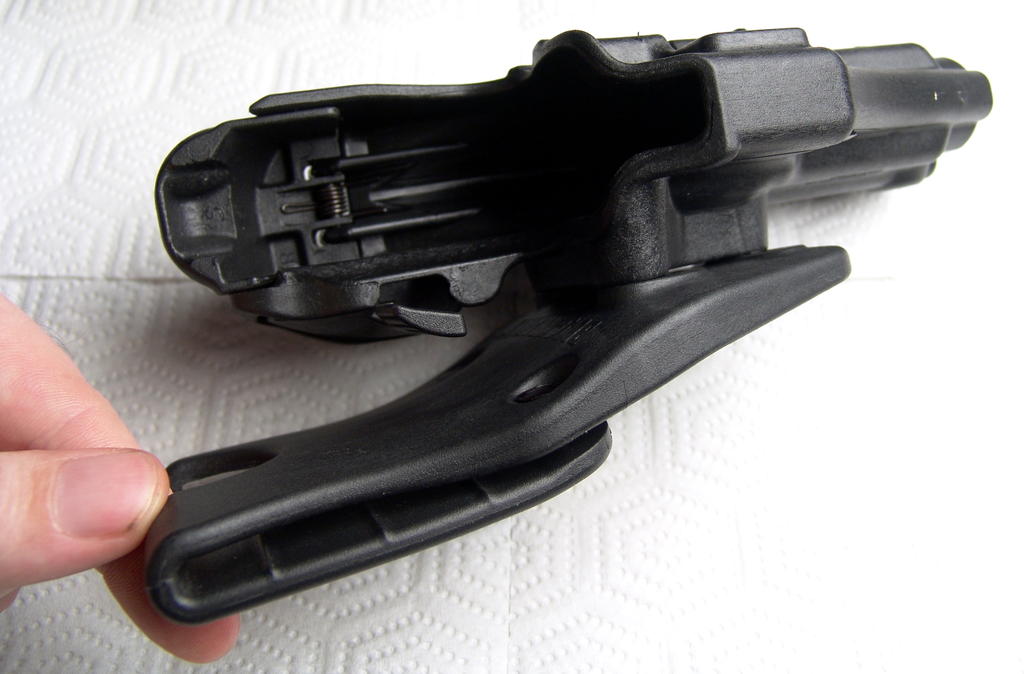
Configuring the SerpaThe Serpa level 3 holster can be configured for cant (also known as rake) in three different directions: vertical, forward, or rearward. It can also be configured for distance from the hip. For hip-worn use, most users will want the holster to be vertical or rearward-canted. Forward cant is known as "FBI cant", which is typically only used if your gun is positioned towards the rear of the hip rather than the side. If you've bought a different variant of this holster, you may actually end up installing the same holster on a drop-leg platform, a paddle, or a patch of molle webbing. The holster itself stays the same, while the attachment method is modular. Anything with three screws of the correct size in the correct configuration will work. Yes, this also means that you could even put correctly-spaced bolts for a Serpa holster into a vehicle's body panel, the underside of a desk, etc. Update: Blackhawk has generously offered to send me some additional attachment options for this holster, so this article will be updated later with some close-ups of how the holster interacts with the other mounts. At that point, the configuration section (universal across the Serpa holsters with the three screws) will merge into the main Serpa article, and this article will strictly cover the holster itself.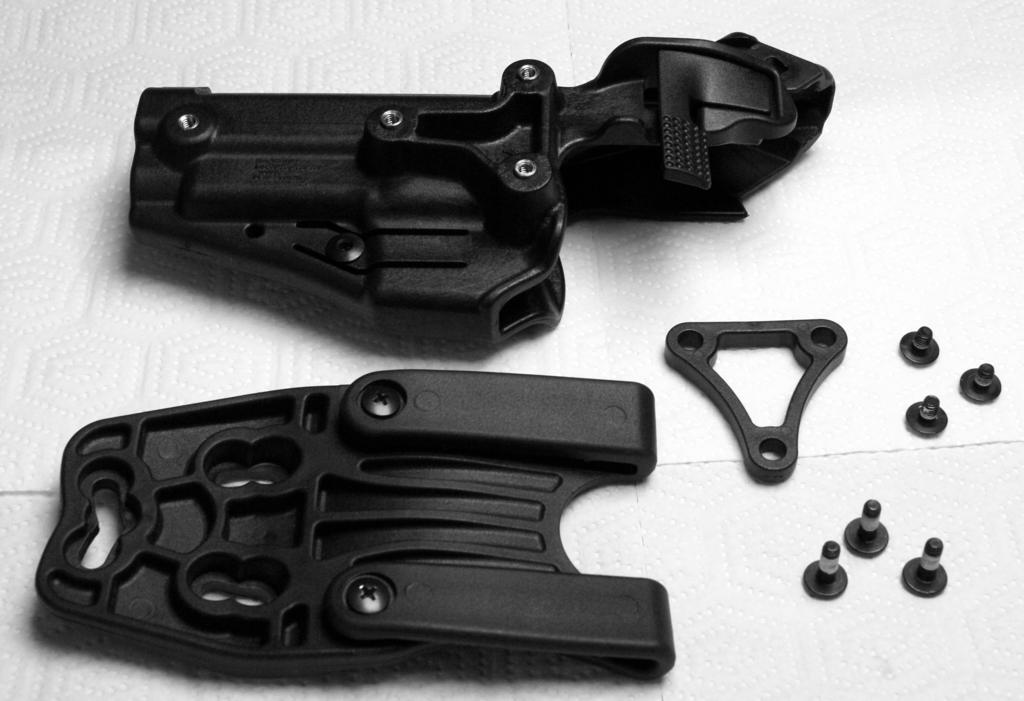 This picture shows everything that comes with the Serpa Level 3 holster. As you can see, the belt clip attachment (the large dark item towards the bottom of the image) is a separate module from the holster itself. This is so that, instead of producing a large number of holsters with varying methods of attachment, Blackhawk can produce a few standard attachment modules and a large variety of weapon-specific holsters. Included with the holster are two sets of three screws. The shorter set is used if you're attaching the holster directly to the belt attachment, and the longer ones are used if you want to use an offset spacer to increase the distance between the weapon and your hip. With or without the offset piece, the holster feels quite solid. This picture shows everything that comes with the Serpa Level 3 holster. As you can see, the belt clip attachment (the large dark item towards the bottom of the image) is a separate module from the holster itself. This is so that, instead of producing a large number of holsters with varying methods of attachment, Blackhawk can produce a few standard attachment modules and a large variety of weapon-specific holsters. Included with the holster are two sets of three screws. The shorter set is used if you're attaching the holster directly to the belt attachment, and the longer ones are used if you want to use an offset spacer to increase the distance between the weapon and your hip. With or without the offset piece, the holster feels quite solid.
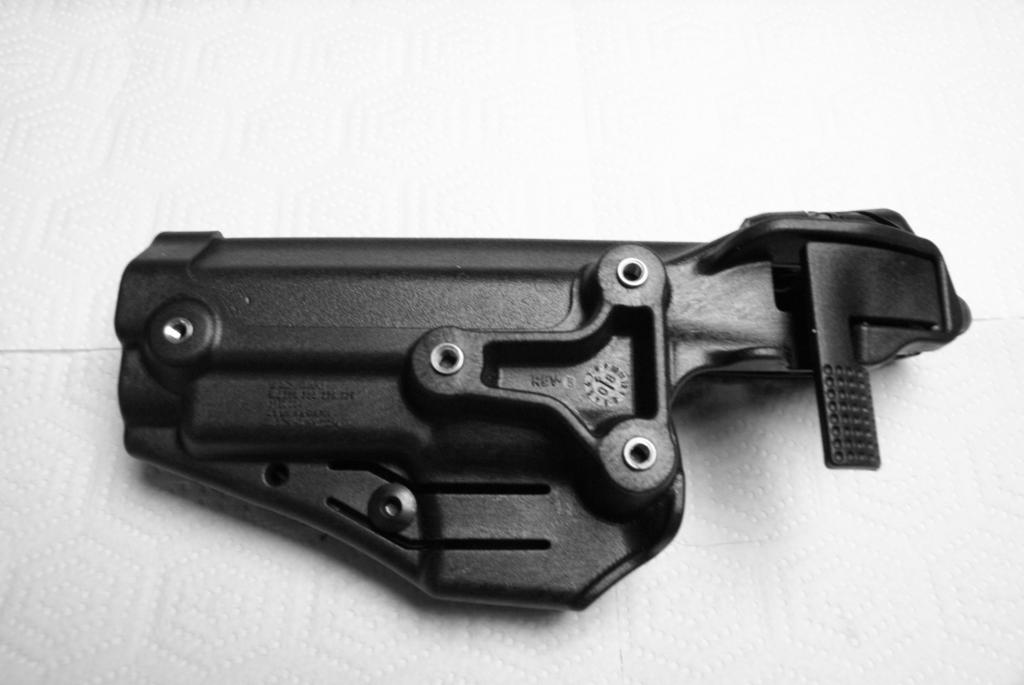 The three screw holes on Serpa holster are how you configure the holster's cant. In the picture above, you'll notice that the belt attachment has three slots, which are used to attach the holster to the belt. The reason they are slots instead of holes, is so that you can configure the holster to be vertically oriented, or canted forward or rearward.
Note also that you can see some writing on the lower part of the inside of the holster. In addition to listing the weapons that this holster was designed to fit, this area also lists the holster's individual serial number. My holster indicates that it'll accommodate the Sig 220, 226, 228, and 229 models. The three screw holes on Serpa holster are how you configure the holster's cant. In the picture above, you'll notice that the belt attachment has three slots, which are used to attach the holster to the belt. The reason they are slots instead of holes, is so that you can configure the holster to be vertically oriented, or canted forward or rearward.
Note also that you can see some writing on the lower part of the inside of the holster. In addition to listing the weapons that this holster was designed to fit, this area also lists the holster's individual serial number. My holster indicates that it'll accommodate the Sig 220, 226, 228, and 229 models.
 This is the vertical position for the holster. This is the vertical position for the holster.
 This is the forward-canted position. This is the forward-canted position.
 This is the rearward-canted position. Notice that, in each of the positions above, the screws are positioned at the ends the slots they're in, with no room for travel. I found the positioning of the slots and holes to be fascinating - you'd think that a design where the screws are all in slots instead of holes would result in a mere tension fit and considerable wobbling, but movement isn't possible with the angles used when all three screws are in position. This is the rearward-canted position. Notice that, in each of the positions above, the screws are positioned at the ends the slots they're in, with no room for travel. I found the positioning of the slots and holes to be fascinating - you'd think that a design where the screws are all in slots instead of holes would result in a mere tension fit and considerable wobbling, but movement isn't possible with the angles used when all three screws are in position.
 Canted rearward, with the screws installed. I found this to be the most comfortable way to draw, although it technically does make it a bit easier for someone behind you to grab your weapon. Canted rearward, with the screws installed. I found this to be the most comfortable way to draw, although it technically does make it a bit easier for someone behind you to grab your weapon.
Closeup of the Level 3 Release System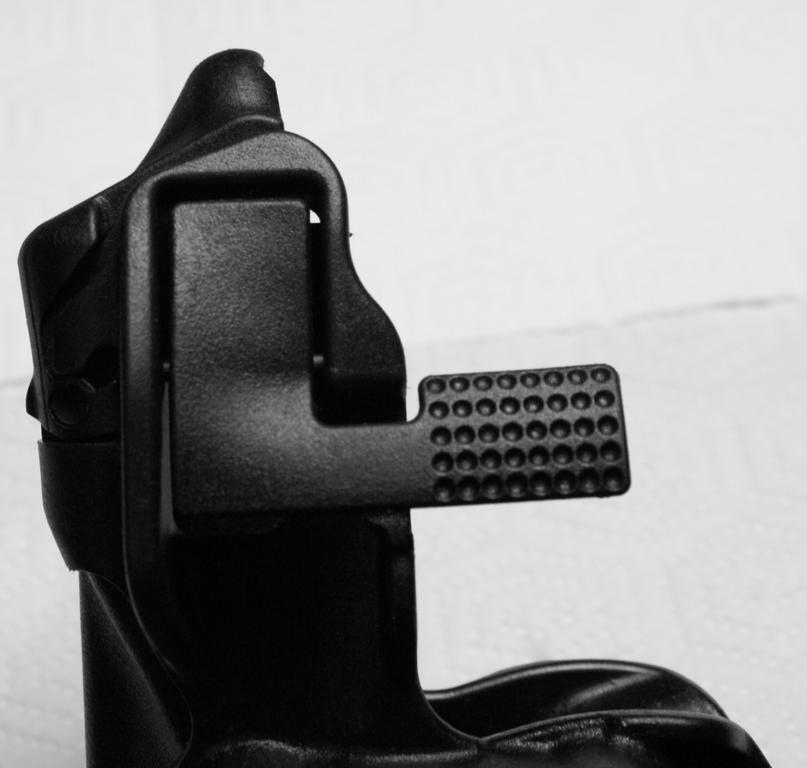 This switch, meant to be pressed with your thumb before drawing the weapon, releases a spring-loaded "cap" which normally covers the hammer and rear of the slide. This switch, meant to be pressed with your thumb before drawing the weapon, releases a spring-loaded "cap" which normally covers the hammer and rear of the slide.
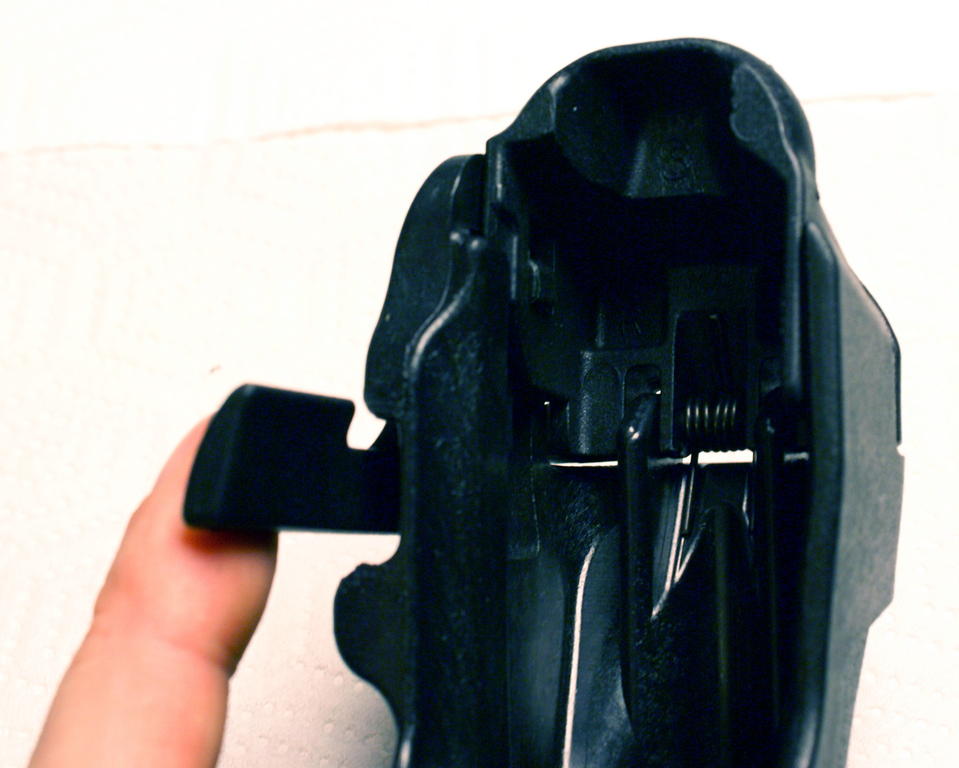 Pressing down on the switch moves a small tab on the side. It's worth knowing that the tab is not angled - in order to re-lock the retention flap, you must press the button; you can't just close the lock on the gun without pressing the button. More on this later. Pressing down on the switch moves a small tab on the side. It's worth knowing that the tab is not angled - in order to re-lock the retention flap, you must press the button; you can't just close the lock on the gun without pressing the button. More on this later.
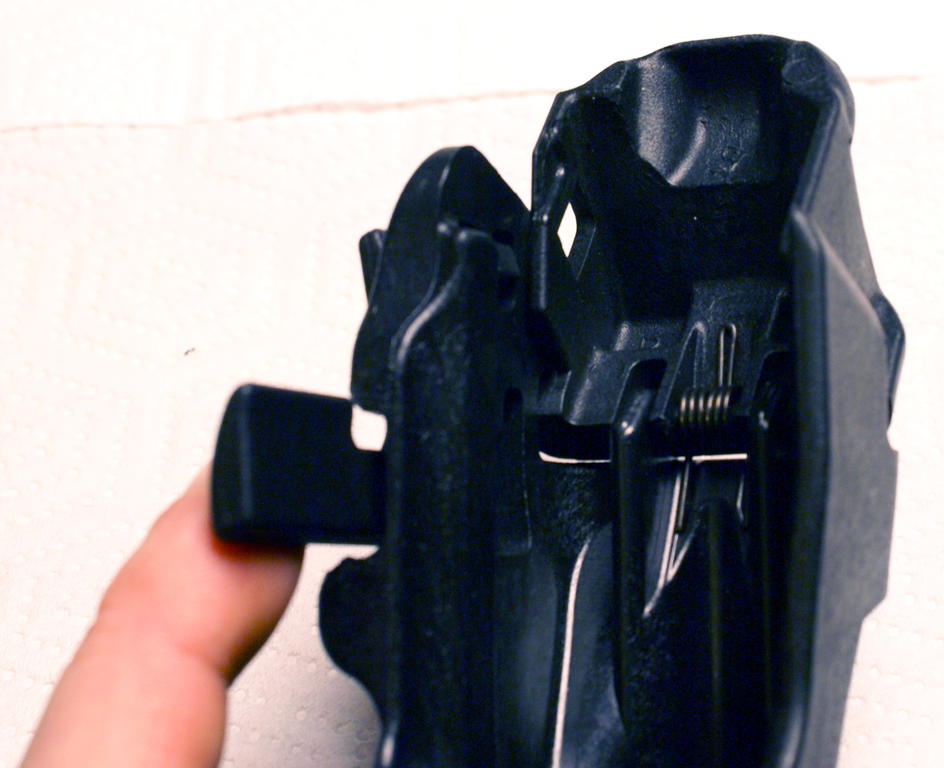 When the switch is pressed, the spring-loaded lock flips up very quickly. When the switch is pressed, the spring-loaded lock flips up very quickly.
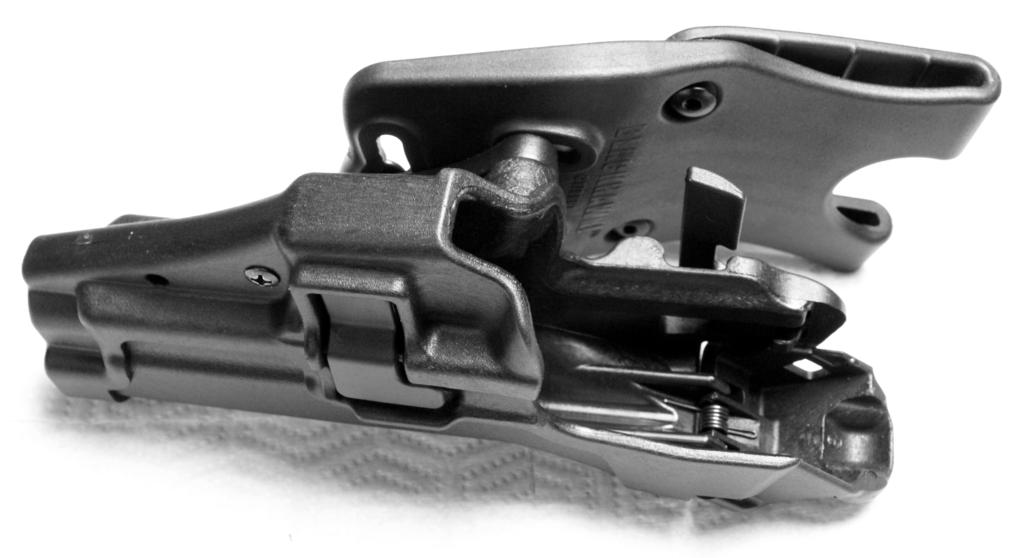
Various Design Observations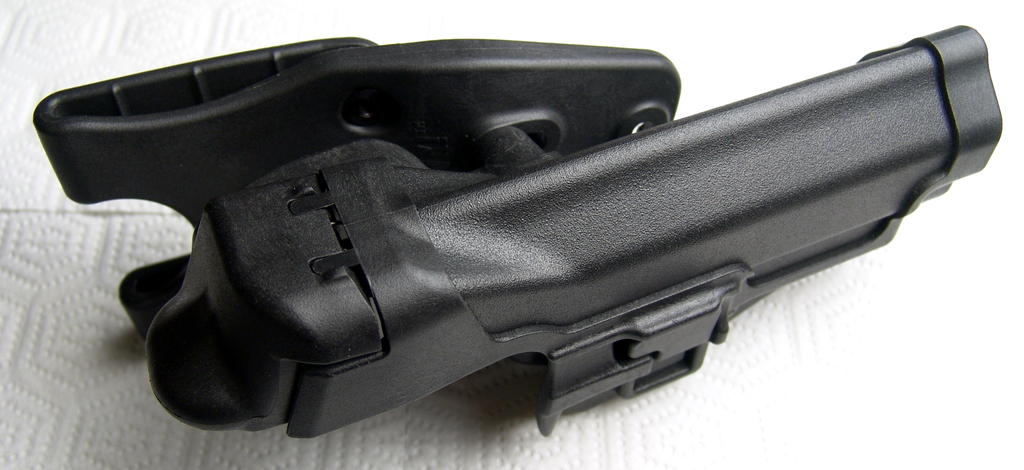 The level 3 retention cap is actually hinged at two points. The swell at the center rear of the device accomodates the pistol's hammer. The level 3 retention cap is actually hinged at two points. The swell at the center rear of the device accomodates the pistol's hammer.
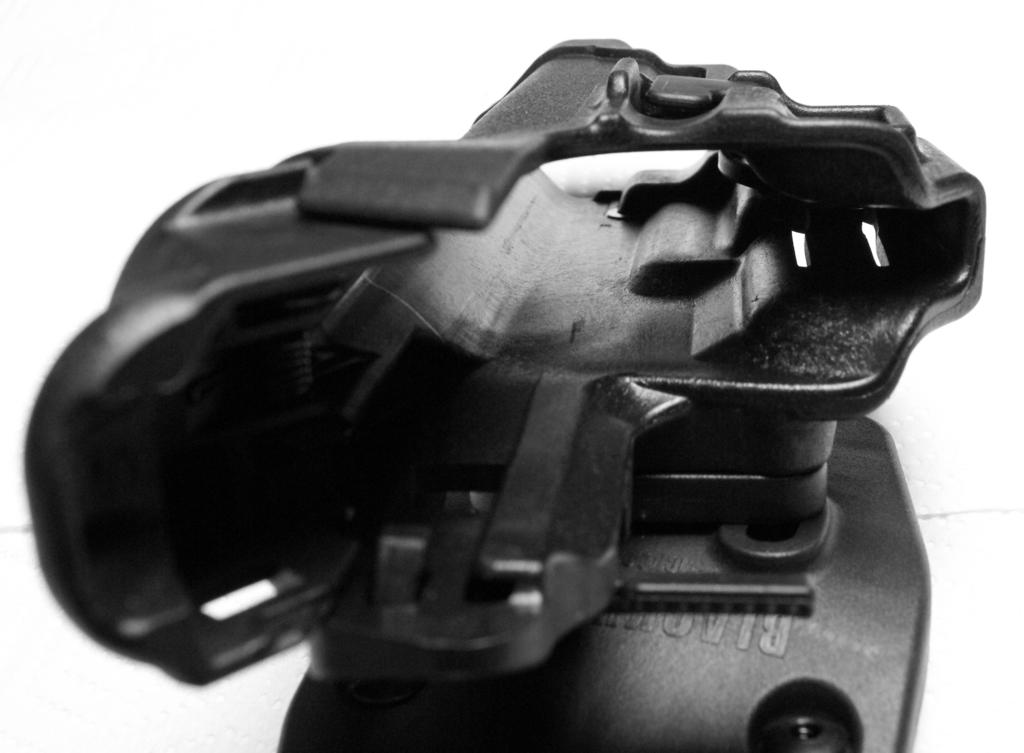 This is a closeup after the release has been tripped, causing the cap to flip into the upward, unlocked position. You can also see that the lower section is contoured at multiple points in order to hold the weapon securely.
Take particular note of the release tab and the hole on the cap into which it fits when in the locked position. The release tab itself is rectangular. If it were tapered, you could press the cap down until it clicks in place. Although this may seem desirable at first glance, it actually wouldn't be. For one thing, a tapered cap would wear down or break far more readily than a rectangular one. But more importantly, if you prefer to keep your weapon in level two mode, having it arbitrarily "upgrade" itself to level 3 when you accidentally close the cap could potentially be life-threatening. This is a closeup after the release has been tripped, causing the cap to flip into the upward, unlocked position. You can also see that the lower section is contoured at multiple points in order to hold the weapon securely.
Take particular note of the release tab and the hole on the cap into which it fits when in the locked position. The release tab itself is rectangular. If it were tapered, you could press the cap down until it clicks in place. Although this may seem desirable at first glance, it actually wouldn't be. For one thing, a tapered cap would wear down or break far more readily than a rectangular one. But more importantly, if you prefer to keep your weapon in level two mode, having it arbitrarily "upgrade" itself to level 3 when you accidentally close the cap could potentially be life-threatening.
 Another picture from the side, in the locked position. If you zoom in, you can make out the rectangular tab mentioned above. Another picture from the side, in the locked position. If you zoom in, you can make out the rectangular tab mentioned above.
 Between the two points of the retention cap's hinges, you'll notice a fairly strong spring which powers the spring-loaded level 3 lock. Between the two points of the retention cap's hinges, you'll notice a fairly strong spring which powers the spring-loaded level 3 lock.
 Slightly left of center, you'll notice the primary release button, which is identical in appearance on all of the Serpa retention holsters I've seen. It's a lever switch, shaped like a capital L. The bottom of the L is where your finger presses while drawing your weapon. It pivots on a pin which you can see approximately midway up the L's vertical leg, and retracts a tab which sticks straight down into the weapon's trigger guard to a small degree. Unlike the secondary retention system, the primary system is designed not to require you to press the button in order for it up lock in place. The weight of a pistol dropping into the holster is enough to move the retention tab out of the way until the trigger guard has passed the tab, at which point the mechanism locks into place with a reassuring click.
-- SeanNewton - 11 Oct 2008 Slightly left of center, you'll notice the primary release button, which is identical in appearance on all of the Serpa retention holsters I've seen. It's a lever switch, shaped like a capital L. The bottom of the L is where your finger presses while drawing your weapon. It pivots on a pin which you can see approximately midway up the L's vertical leg, and retracts a tab which sticks straight down into the weapon's trigger guard to a small degree. Unlike the secondary retention system, the primary system is designed not to require you to press the button in order for it up lock in place. The weight of a pistol dropping into the holster is enough to move the retention tab out of the way until the trigger guard has passed the tab, at which point the mechanism locks into place with a reassuring click.
-- SeanNewton - 11 Oct 2008
|

Topic revision: r12 - 17 May 2012 - SeanNewton


Ideas, requests, problems regarding TWiki? Send feedback