AR-15 Fixed Buttstock Installation
Unfortunately, although I shall describe herein and with pictures the process of installing an AR-15 fixed buttstock, I don't actually have any pictures of the removal process. I shall, however, describe the process and removal is basically the reverse of the installation process.Things that Can Go Wrong
There are a few common problems which you can run into with fixed butt stocks on the AR. Hopefully, you won't encounter any of these.- Overtightening a buffer tube can CRACK your receiver! This is far less common now with forged receivers, but years ago it wasn't uncommon to crack a receiver by over-tightening the buffer tube. Per TM9-1005-319-23, section 3-81, the proper range of torque is 35-39 ft-lbs.
- Frequently installing and removing buffer tubes can strip out your receiver threads! It's not necessary to take this to the extreme of never changing the stock on your AR, but don't change the butt stock very frequently.
- If you have managed to strip out the threads on your buffer tube, your only repair for it is to tap and re-thread it for a larger size of screw. And you must find a screw with a hole in the center to let air out, too. I would consider replacing the buffer tube if I were in this position, personally. Buffer tubes are cheap, and finding just the right screw would be tough. If you don't already own taps, it would likely be more expensive to obtain the right size screw and buy the right size tap, than to simply buy a new buffer tube.
Preparation
We'll assume that your stock has arrived in its most common configuration - the tube is not installed, there's a black plastic spacer that came with it, and you have a receiver ready to accept the stock. If you don't have a trapdoor buttstock plate and you're going to want one, I strongly recommend that you get it BEFORE you undertake this procedure. While possible, unscrewing a buffer tube that's has the top buttstock screw installed is a real pain.- Get the right size of screwdriver! I cannot stress enough that the screwdriver you use here must fit the upper buttstock screw snugly. Typical thin-bladed screwdrivers will just end up trying to strip out and mangle the screw. This generally means you're going to be using a large screwdriver.
- Take the upper buttstock screw, and soak it in lubricant. Trust me, this is for the best. It's entirely too easy to end up stripping out your buttstock screw during an installation. Note that the screw has a hole in the center (info below) and usually a dab of red paint-like substance on it. I've heard the red stuff is nylon, and I've also heard claims that it's locktite. Either way, it ensures that screw grips REALLY tightly to those threads.
Instructions
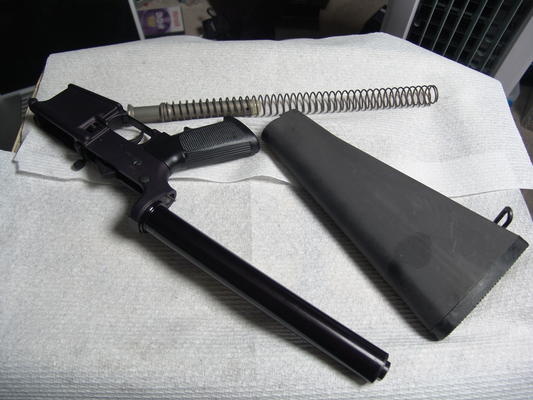
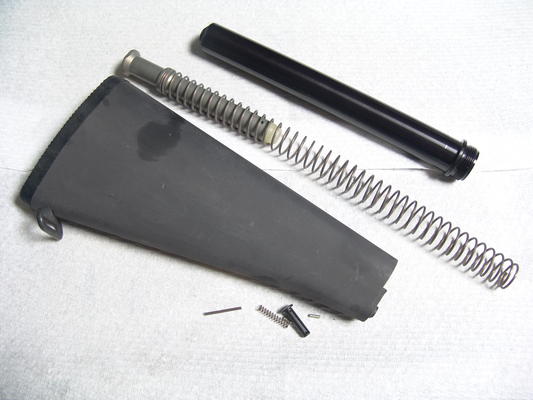 When you buy an A2 stock kit, this is generally what it will look like. The long black part is the buffer tube, the long spring is the recoil spring, and the gray widget attached to it is the recoil buffer. There are also a variety of springs and detents, as well as a rear takedown pin, involved in this as well.
 First, separate the buffer tube and align it with the rear of the receiver. You will be screwing it part of the way in, but not all of the way.
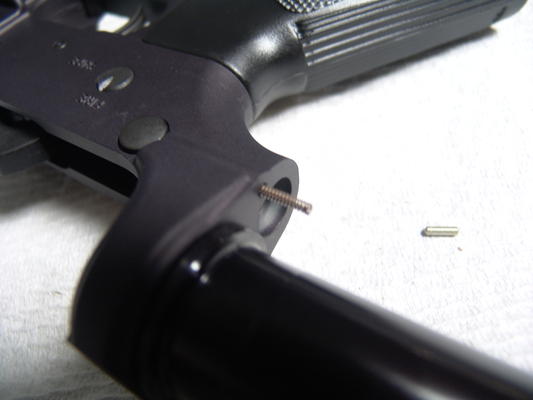
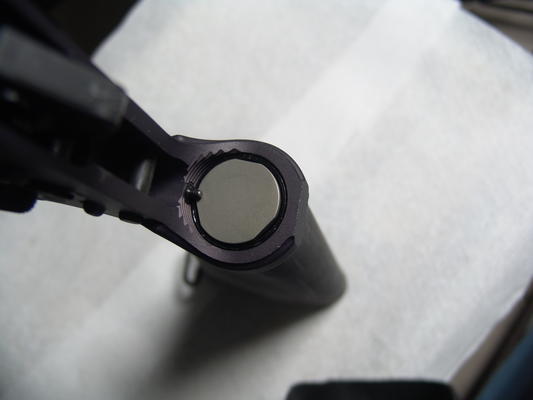
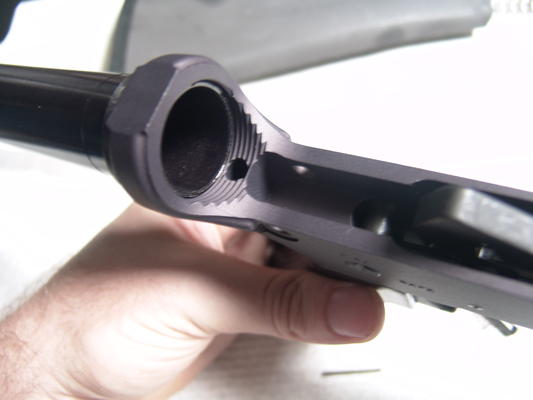 As this image shows, you should stop it right before it's about to cover the buffer detent's hole in the rear of the threaded part of the receiver.
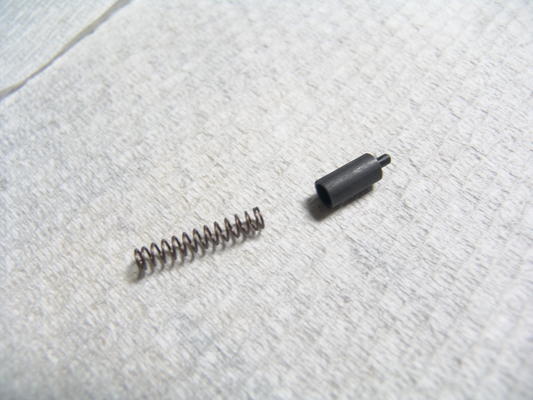 This is the buffer detent and spring. You'll installation easiest if you put the spring into the hole, then the detent.
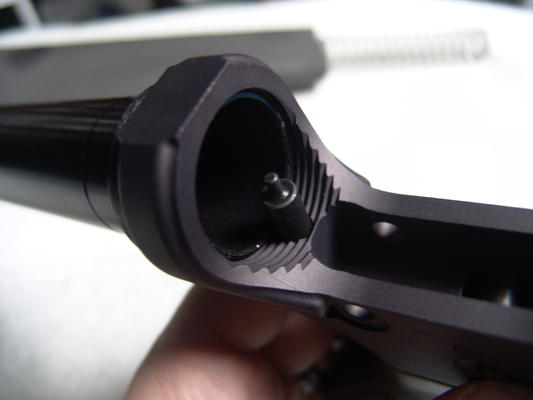 This is the detent, installed into its appropriate hole. You'll note the stub sticking up from the detent. The shoulder around the stub remains beneath the buffer tube - the buffer tube actually captures the detent and keeps it from bouncing back up out of the receiver. The stub itself sticks up a bit past the buffer tube, and serves to retain the recoil buffer so that it doesn't simply get pushed into the action of the weapon by the spring.
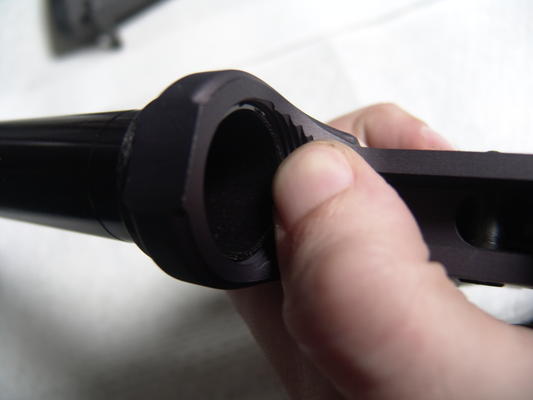 Press down on the detent with your thumb (or, if you have a low pain threshold or don't feel the need to prove yourself... put something else on top of it), then screw the buffer tube in the next few turns until snug. The buffer tube should stop securely just short of the stub on the buffer detent.
 This is how it should look once you're done.
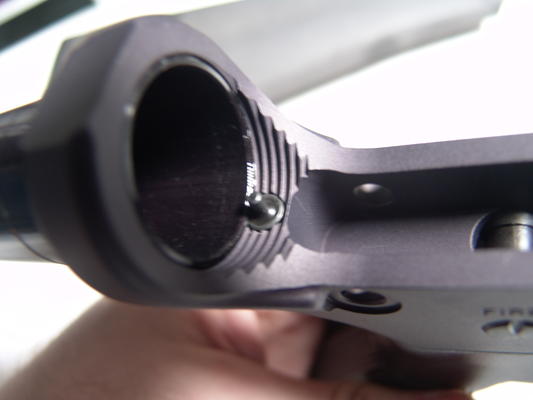
 Notice the small, black hole just underneath and to the right of the buffer tube. This is the hole you're going to drop the detent and spring into a couple of steps later.
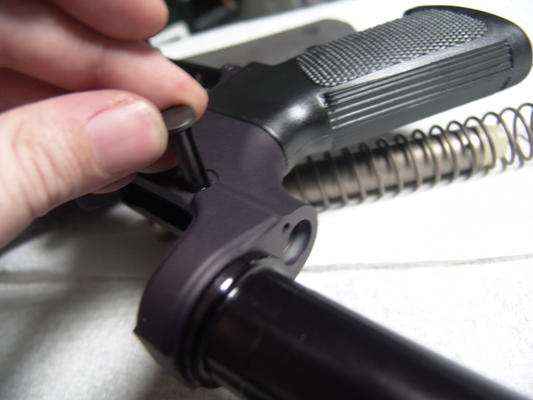 This is the insertion of the rear pivot pin. Note the location of the groove - it should point directly to the back of the rifle. Remember that hole I mentioned in the previous step? The detent pin will be put through that, and will reside in that groove.
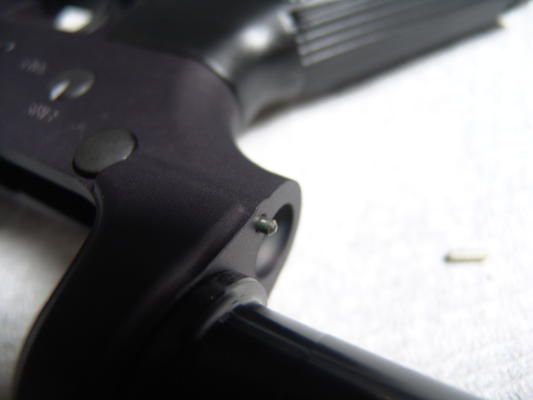 In this picture, the detent pin has been halfway inserted into the hole.
 Next, put the long detent spring into the hole after the detent.
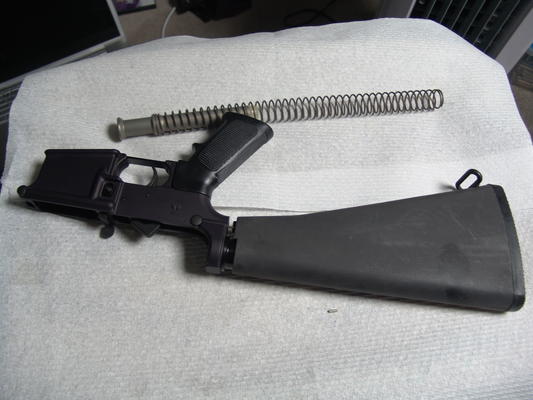
 Your rifle should now look like this - you are ready to slide the buttstock on over the buffer tube.
 If your stock came with a black plastic spacer, drop it down into the hole in the stock, then put the buffer tube down the same hole. If the lip of the buffer tube can't rest flush against the stock, then you don't want the spacer down there. If it can, then leave it in place to eliminate some play between the screw and the buffer tube. At any rate, slidet the stock down over the tube until the stock is flush with the receiver. Make sure that the spring is lined up with the corresponding hole in your stock, as you don't want to crush/mangle the spring during this process.
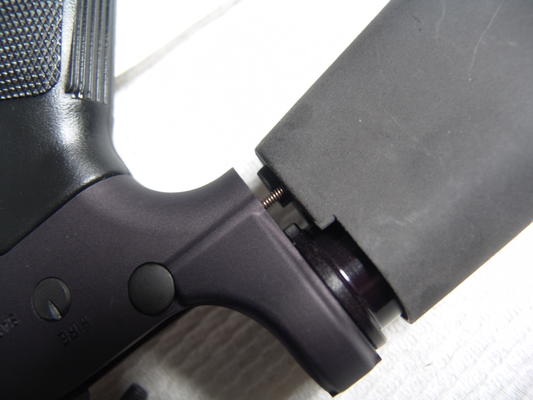 A closeup of how things should look when they're properly aligned. Note the gray protrusion coming out from the stock at the bottom, which fits into a matching hole in the receiver. Now, some receivers have oversized holes, and this can result in buttstocks that want to shift back and forth. I personally cram a few rubber O-rings into this hole if the receiver/stock connection is too loose for my taste.
 You're now ready to install the buttstock screw. It goes into the hole in the top of the buttstock. This particular screw isn't exactly an ordinary machine screw.
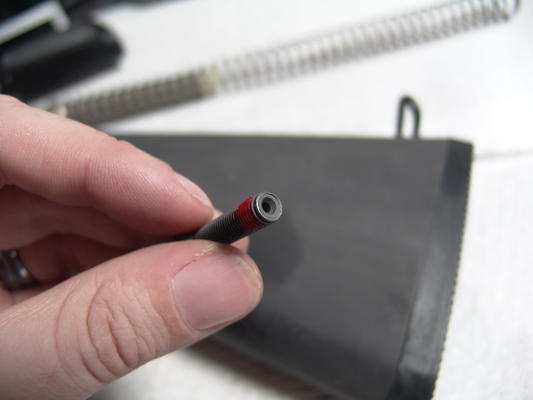 As you'll note, there's a hole which goes all the way through it. This is to allow air, water, etc to escape the rifle instead of being trapped within it. Without this hole, the buffer tube would functionally become a pneumatic piston, compressing the air and not letting it out. Chances are that it would add enough resistance on the rearward motion to cause malfunctions. Also note the red material towards the bottom of the screw. I've been told that it's nylon, and I've been told that it's red loctite. Either way, it makes the screw really tough to turn towards the end, which means you need a large screwdriver. See the "Preparation" section if you think you can get by with a screwdriver that's not big enough. Now, you can get by with the screwdriver point on the top of an AR-15 armorer's wrench, but it's really the very minimum size you could possibly use for this. You'll be much better off with a large-bladed, flat head screwdriver.
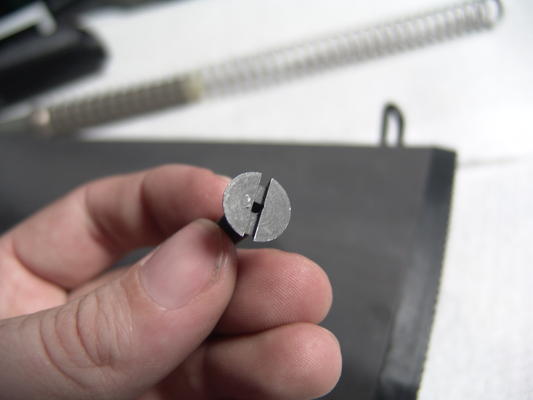 The same screw, viewed from the top.
 Tighten the screw until the tube fits snugly to the receiver, taking great care not to slip and strip the screw head. You'll note that the upper buttstock screw needs to be REALLY tight before the buttstock is firmly seated.
 - Now, twist the screw as if you were attempting to remove it. What will happen, rather than the screw coming loose from the tube, is that the buffer tube will unscrew from the receiver! Take care not to lose the spring from your rear takedown pin. Now insert the spring and buffer detent that you left out earlier, and screw the buttstock back on until the shoulder of the detent is just barely covered by the lip of the buffer tube. Don't forget to align your rear takedown pin's spring with the stock again! I would also recommend checking at this point to ensure that you don't have excessive play between the receiver and stock.
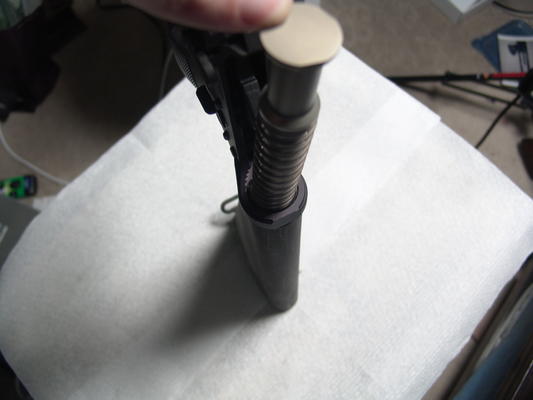 Assuming that you've got the buttstock on there nice and firm, this is the part where you put the buffer into the recoil spring, and then put the spring down into the buffer tube. If the hammer isn't already cocked, then cock it before you try to put the spring in. The spring goes first, as in this image.
 Keep pushing until the buffer goes past the stub on the buffer detent and locks into place.
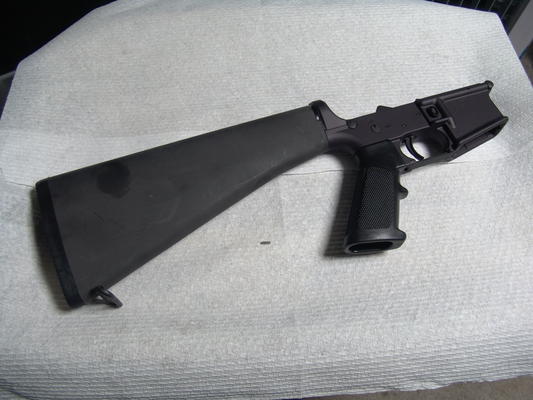 The completed rifle should look more or less like this, with everything installed.
Removal
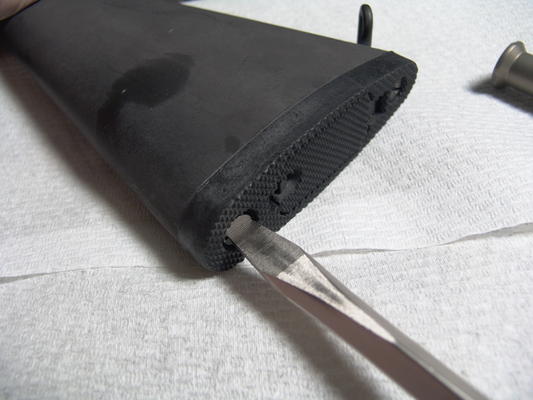
The large screwdriver is actually even more important during stock removal than during stock installation.- First, remove the buffer and buffer spring. To do so, press down on the buffer detent. The buffer and spring will start out as soon as it's down far enough. Simply pull it along to get it out of the way.
- Unscrew the top buttstock screw. Either the buffer tube or the screw will start turning when you use enough force - more likely the buffer tube. If the buffer tube starts spinning, then place your finger over the buffer detent and spring (as the detent will otherwise launch out of the receiver as soon as its shoulder is no longer held in place by the buffer tube.
- Next, finish unscrewing things. If the buffer tube was turning, the entire stock assembly will come off in short order. If just the buttstock screw was turning, you can slide the buffer tube off. Either way, as soon as the stock is gone, the detent and spring will be in danger of falling out if you aren't careful.
- If, at this point, you have a tube attached to your receiver and don't want to keep it there, just grab onto it with your hand and twist hard. Bear in mind the warning from the second step, because you don't want the buffer detent to launch out of the receiver and into the ceiling.
This topic: Gunwiki > WebHome > ArticleIndexByGun > RefArFamily > RefAR15Buttstocks > ProcArFixedButtstockInstallRemove
Topic revision: r3 - 29 Apr 2014 - SeanNewton
Ideas, requests, problems regarding TWiki? Send feedback